|
SBLM will be the third Bittergame LK. M design:
0 Comments
SBLN is the second Bittergame LK.
SBLN is the same blade design as the Bittergame SK but much longer. The "N" in SBLN is chosen because:
The photo shown is a SBLN with high point. It has a tip rise 1.25 inches at least. SBLH is the very first Bittergame LH.
The photo shown is a SBLH with medium point. It has a tip rise of approximately 1.0 inch. SBSK is the very first Bittergame SK.
The photo shown is a SBSK with full drop point. It has a tip rise of approximately 0.5 inch. SBLK is the very first Bittergame LK.
SBLK have the narrowest blade of all cockfighting long knives that we knew of. Its widest edge is less than 5 mm or exactly 3/16 inch. The photo shown is an SBLK with a high point. It has a tip rise of approximately 1.25 inches. Let us read a little about katana before diving on sword sharpening at the bottom. Historically, katana (刀) were one of the traditionally made Japanese swords (日本刀 nihonto) that were worn by the samurai class of feudal Japan, also commonly referred to as a "samurai sword". Modern versions of the katana are sometimes made using non-traditional materials and methods. If mishandled in its storage or maintenance, the katana may become irreparably damaged. The blade should be stored horizontally in its sheath, curve down and edge facing upward to maintain the edge. It is extremely important that the blade remain well-oiled, powdered and polished, as the natural moisture residue from the hands of the user will rapidly cause the blade to rust if not cleaned off. The traditional oil used is choji oil (99% mineral oil and 1% clove oil for fragrance). Similarly, when stored for longer periods, it is important that the katana be inspected frequently and aired out if necessary in order to prevent rust or mold from forming (mold may feed off the salts in the oil used to polish the katana). The authentic Japanese sword is made from a specialized Japanese steel called "Tamahagane" which consist of combinations of hard, high carbon steel and tough, low carbon steel. There are benefits and limitations to each type of steel. High-carbon steel is harder and able to hold a sharper edge than low-carbon steel but it is more brittle and may break in combat. Having a small amount of carbon will allow the steel to be more malleable, making it able to absorb impacts without breaking but becoming blunt in the process. The makers of a katana take advantage of the best attributes of both kinds of steel. The maker begins by folding and welding pieces of high and low carbon steel several times to work out most of the impurities. The high carbon steel is then formed into a U-shape and a billet of soft steel is placed in its center. The resulting block of steel is then drawn out to form a rough blank of the sword. At this stage it is only slightly curved or may have no curve at all. The gentle curvature of a katana is attained by a process of quenching; the sword maker coats the blade with several layers of a wet clay slurry which is a special concoction unique to each sword maker, but generally composed of clay, water, and sometimes ash, grinding stone powder and/or rust. The edge of the blade is coated with a thinner layer than the sides and spine of the sword, then it is heated and then quenched in water (some sword makers use oil to quench the blade). The clay slurry provides heat insulation so that only the blade's edge will be hardened with quenching and it also causes the blade to curve due to reduced lattice strain along the spine. This process also creates the distinct swerving line down the center of the blade called the hamon which can only be seen after it is polished; each hamon is distinct and serves as a katana forger's signature. When steel with a carbon content of 0.7 percent is heated beyond 750 degrees C it enters the "austenite phase". When austenite is cooled very suddenly by quenching in water the structure changes into "martensite", which is an extremely hard form of steel. When austenite is allowed to cool slowly its structure changes into a mixture of ferrite and pearlite which is softer than martensite. By carefully controlling the heating and cooling of the blade being forged Japanese swordsmiths were able to produce a blade that had a softer body and a hard edge creating a superior weapon, this process is called differential hardening or differential quenching. The reason for the formation of the curve in a properly hardened Japanese blade is that iron carbide, formed during heating and retained through quenching, has a lesser density than its root materials have separately. After the blade is forged it is then sent to be polished. The polishing takes between one and three weeks. The polisher uses finer and finer grains of polishing stones until the blade has a mirror finish in a process called glazing. This makes the blade extremely sharp and reduces drag, making it easier to cut with. The blade curvature also adds to the cutting power. Sword Sharpening Be very careful when sharpening katana. Please don't think about sharpening a sword that could be a valuable heirloom. You could be destroying an irreplaceable piece of history and costing yourself hundreds of thousands. A Practical Katana or rusty gunto is a good place to start. Practicing with 2000 grit or finer stones makes it harder to destroy the geometry of the blade, but you should expect to destroy the first blades you try to sharpen.
Nihonzashi LLC, its employees, and associated companies are not responsible for any injury, damage or loss incurred by following any advice given on this site. Katana are dangerous objects and the utmost care should be given when working with them. Grit The first thing everyone asks is what grit stones are used to polish or sharpen a sword. What could be easier than selecting grit? Is that US, European, English, or Japanese grit? Grit specified the mesh used to separate the abrasive particles, but everyone uses a different standard and they don't compare well. Things really fall apart at the finer grits since the US standard switches from grit to particle size in microns. The following table will give you some clues on how to relate the different standards. From this point I will use the Japanese grit since I use Japanese water stones graded by this standard. Equivalent Grit Table
Japanese Water Stones Japanese water stones are either natural or artificial. Natural stones can be quite expensive, but artificial stones can be used for sharpening polish. About half the stone used in a full cosmetic polish can also be artificial, but some steps require specific natural stones. Artificial stones use a graded abrasive suspended in either a clay or ceramic media. The stones use water as a lubricant. Even the inexpensive stones can run $50 each. Soaking the Stones Japanese water stones need to be soaked in water to work properly. Stones take from 5 to 20 minutes to become saturated depending upon the stone. While some stones can be stored in water others must be stored dry. I store all my stones dry and soak them for 20 minutes to simplify things. I put about a quarter cup of sodium bicarbonate in the water. Baking soda will change the pH of the water and keep your sword from rusting while you are sharpening it. Some stones like those from Debado should not be soaked but simply sprinkled with water before using. These stones will deteriorate if soaked. Shaping the Stones Japanese water stones constantly wear down during use. This is normal and helps maintain an aggressive cutting surface. Some stones wear down quite quickly while other stones are quite stable. Stones used to sharpen a sword should be slightly convex and have rounded corners. The stones will become concave (hollowed out) during use so they should be reshaped before or after each use. Special stones are available for keeping your stones true, but I just use each stone to flatten the next finer grit stone when I switch grits. Keeping the edges rounded or beveled will keep the stone from fracturing and help keep you from grinding a grove in your blade. Sharpening Base Being a westerner with a bad back, I sharpen swords standing. I use a custom wood platform on my workbench to secure the stones to. Some stones are already attached to bases, and I use one of those standard rubber bases for unmounted stones. You need a sturdy platform that stands up to the water. I used a platform that fit over the kitchen sink when I was single, but a couple of buckets for water keep me out of trouble now. You might prefer clamping down your stones and base, but I find it is unnecessary. Straightening the Blade You might have to straighten the blade before you sharpen it. This is your last chance. Once you start sharpening, the geometry will be lost. Straightening a sword is an art in itself. The simplest method but hardest to master is simply bending it over your knee after sighting down it's length. There are slotted wood sword straightening tools available that allow you to isolate the bend easier. Whatever method you choose, just remember to take your time. Getting a Grip The sword should be disassembled and the bare blade sharpened. Even the habaki should be removed. I use a piece of an old towel about 1x1 foot wrapped around the blade to provide a good grip. It has to be tight so it does not slide (and slice). When I'm working the monouchi I use my right hand to grip the sword and my left hand to counter the weight of the sword and steady the kissaki. Be careful of slipping your left hand off the blade or you could loose a few fingers. Make sure to wipe off any oil. I use two pieces of towel to grip the sword with both hands when working on other parts of the blade. Remember that it is easy to cut yourself badly when sharpening a sword. Sharpening The blade should pass over the stone using a uniform even stroke. This is polishing and not grinding! I use both the forward and backward movement to do the work. Go slow and inspect the blade often. Don't worry about how the edge feels. Just make sure you have worked the stone over the entire surface of the blade while maintaining the surface geometry. A good light source is essential to seeing where you have missed. Remember that you are not sharpening the edge. You are removing metal until the edge is exposed. Scratch Pattern The first stone should be used until the scratch pattern just reaches the edge. The only exceptions are when removing chips or when the edge has been flattened. The geometry should be established with the coarsest stone and subsequent stones should just refine the surface. The angle of the scratch pattern of each stone can be varied to make sure all the scratches from each stone are removed by the next. Holding the blade up to the light will reveal scratches from previous stones cutting across the pattern. Cosmetic polishes alternate the pattern by 90 degrees to make sure every scratch is removed. Leave the Edge The most common mistake is paying too much attention to the edge. All your attention should be on the surface of the blade. The surfaces must be removed to reveal the edge. The first stone is key. The surfaces should be worked until the scratch pattern reaches the edge while maintaining the desired surface geometry. You must keep working with the first stone until the scratch pattern reaches the edge. There may be only a very thin polished surface that reflects the light, so look very carefully. If the edge has been flattened or chipped, you need to continue past this point. 100 Strokes Once I have established the geometry with the coarsest stone, I use 100 strokes of each stone on both sides of the blade to refine the surface. I use long strokes that cover about 15 inches of blade. I find the geometry comes out more uniform this way. That also means that the entire monouchi can be covered in a single stroke. The blade is rotated very slightly to cover the entire surface from the shinogi to ha. Rounding the Shinogi It is key to not round over the shinogi. This is the line that runs down the length of the blade delineating the cutting surface. The blade will need to be worked right up to the shinogi line, but it is very easy to turn the blade too much and destroy the geometry of the blade. The blade has a tendency to roll over and round the shinogi due to its curvature. You can hear when the stone is working the shinogi or ha. The tone of the scraping changes slightly as you reach the edge. Be careful! Lubrication Slurry is formed on the top of the stone as it breaks down. This paste acts as a lubricant and as an abrasive. The stone needs to be periodically re-wetted. Use water with dissolved baking soda to keep the stone wet. Don't wash the paste off the stone. Use your hand to dip water onto the stone and keep the blade clean. A small rag can be used, but be careful not to leave thread or other pieces of debris on the stone or blade. You will need to switch water when you switch stones or the coarse grit in the water will leave scratches in the blade. The finer stones need to have a paste formed with a nagura stone to work properly. The nagura stone is soaked with the water stones and rubbed on the top of the finish stones to form a paste. Power Tools The worst thing you can possible do is using a belt sander, orbital sander, or grinder on your sword. That is the fastest possible way to turn that sword into junk. Power tools can quickly remove the temper or destroy the geometry of the blade. Orbital sanders destroy the geometry by rounding over the ha and shinogi. I use Delta and Makita wet grinders to reshape badly chipped blades, but they need allot of practice to use. The grinding wheels move slow and are water cooled so the blade does not heat up. Abrasive Paper Some people use progressively finer grits of silicon carbide sandpaper to sharpen swords. I have no problem with that, but I personally don't use that method. I'll keep my water stones and let others do their own thing. You can get silicon carbide and diamond lapping film that covers the same abrasive grit range as Japanese water stones. Jigs You can get a wide variety of sharpening systems designed for knifes. These jigs have one big problem. They are all intended to create an edge with a single angle. A katana should have a slightly curved continuous surface from the ha to shinogi. It is not a big knife and can not be sharpened like one. You can get more data about the geometry of a katana by checking out the edge geometry Below is a good read about sharpening written by Joe Talmadge. Translucent Arkansas Stone and Black Arkansas Stone are the finest natural sharpening stones known to man. For thousands of years man has used Arkansas natural stone (novaculite) as knife sharpening stone. These fine sharpening stones prolong the life of your blade because they don't remove large amounts of metal from your blade like some electric systems. Our rare locally mined, Arkansas stones will polish the edge of your knife while you sharpen. These Arkansas knife sharpening stones are made of different grades of Novaculite- hard, compact, homogenous, finely granular, highly pure silica rock mined only in Arkansas. There are three stones on a Tri-Stone: one course, one medium, and one fine. All Tri-Stones include a bottle of honing oil, angle guide and 'How To Use Sharpening Stones' instructions. "How to sharpen a knife." Diamond Stones are the finest "synthetic" sharpening stones. Check out the good read below.... The Sharpening FAQs from the Usenet News Group rec.knives
Author: Joe Talmadge jat@cup.hp.com The KnifeCenter of the InterNet presents this text as a service to our browsing public and make no claims as to its accuracy or efficacy. Some parts have been modified by the KnifeCenter. I. Introduction When I started writing this FAQ, I began by writing a detailed treatise on how to sharpen. I soon found that there was no way I could do this in the kind of detail I wanted without ending up with a book-length FAQ. As it turns out, someone has already written a book on sharpening, and done a better job than I could have done. So the most important part of this FAQ, for the beginner, is the following recommendation: the first thing you need to do is buy and read _The Razor Edge Book of Sharpening_ by John Juranitch. No matter what sharpening system you end up using, the fundamentals as laid out by Juranitch remain intact. I don't agree with Juranitch on everything, but the illustrations he gives really help with understanding the principles. So this FAQ will discuss the central elements of sharpening, and then go on to more detailed subjects. Sharpening angles, hones, sharpening systems, the latest fads in edges (e.g., chisel grinds), etc. Basically, Juranitch will show you how to get a burr and grind it off to end up with a sharp knife. Hopefully, the FAQ will tell you everything else. For many people, when they try to sharpen a knife, the knife actually gets duller! If it's any consolation, I was in the same boat at one time. The best way to start out is to read about the sharpening fundamentals, and then use some kind of sharpening system (discussed below) that pre-sets the angles. That way, you can begin by learning how to raise a burr, feel for the burr, and then grind it away, without having to worry about keeping the angle consistent as well. When you understand how to sharpen, then you can get rid of the rig, buy some flat hones, and learn how to sharpen freehand. II. The Fundamentals of Sharpening - Getting a Sharp Edge Okay I lied about not discussing the sharpening ritual itself. Here's a much-too-short review of the sharpening process, before we get into the rest of the FAQ. If this section is confusing, read _The Razor Edge Book of Sharpening_. Many of the subjects in this section (e.g., stone grits) are explored further elsewhere in the FAQ. You grind one edge along the stone edge-first until a burr (aka "wire") is formed on the other side of the edge. You can feel the burr with your thumb, on the side of the edge opposite the stone. The presence of the burr means that the steel is thin enough at the top that it is folding over slightly, because the bevel you've just ground has reached the edge tip. If you stop before the burr is formed, then you have not ground all the way to the edge tip, and your knife will not be as sharp as it should be. The forming of the burr is critically important -- it is the only way to know for sure that you have sharpened far enough on that side. Once the burr is formed on one side, turn the knife over and repeat the process. To re-cap, you've sharpened one side only until you felt a burr along the entire length of the opposite side, then you switched sides and repeated the process. I suggest you do not follow the directions that come with many sharpeners, of the form "Do 20 strokes on one side, then 20 strokes on the other". You go one side only until the burr is formed; if that takes 10 strokes or 50 strokes, you keep going until you get a burr, period. Only then do you flip the knife over and do the other side. Having raised a burr, our job now is to progress to finer stones, in order to make the edge smoother and remove the burr. So now we run the blade along the stone from end to tip, this time alternating sides with each stroke. Switch to a finer stone, and then do it again. Sometimes, the burr is turned directly downwards during sharpening, and since it is very thin and razor sharp, it seems like an incredible edge. This is called a "wire edge". But being fragile, it will break off the very first time you use the knife, leaving you with an extremely dull knife. If you seem to be getting good sharpening results on your knives, but they are getting dull very quickly with little use, you may be ending up with a wire edge. If that's the case, you'll need to be careful and watch out specifically for a wire edge; you should try progressing down to finer stones, try double-grinding the edge, and give the knife a quick stropping once you're finished (all these terms are explained below). If your knife is fading fast as you're sure it's not because you left a wire edge, steeling between uses may be what you need. My last few strokes on the stone become progressively lighter, to avoid collapsing the edge and raising another burr. On a badly-worn or damaged edge, I'll typically start with a medium (300-400 grit) stone, then move to a fine (600 grit) stone, and then sometimes I'll finish on an extra-fine (1200 grit) stone if I want a more polished edge. However, once my knife is sharp I try to re-sharpen before it gets too worn down. In that case, I can usually start on the fine stone. But be sure to read the important notes on grits later in the FAQ. Lastly, I may use a leather strop on the knife. On other sharpening systems, the same fundamentals as laid out above still apply. For example, on a V-type sharpener, I'll start by sharpening one side only against the right-hand stick until a burr forms. Then I switch to the other stick until a burr forms. Only after I've raised a burr from both sides will I follow the manufacturer's directions and alternate from one stick to the other between strokes. What Angle? The smaller the angle, the sharper your knife will feel. But the smaller the angle, the less metal that's behind the edge, and thus the weaker the edge. So your sharpening angle will depend on your usage. A surgeon's blade will have a very thin, very low-angle edge. Your axe will have a strong, thick, high-angle edge. Something like a razor blade will having an angle of around 12- degrees, and it's chisel-ground so that's 12-degrees total. Utility knives will have angles anywhere between 15- and 24- degrees (30-48 degrees total). An axe will have something around a 30-degree angle. For double-ground utility knives, a primary edge of 15-18-degrees, followed by a secondary grind of 21ish-degrees, works well. Don't be obsessed with getting the exact right angle; rather, make sure that at whatever angle you've chosen, concentrate on holding it precisely. See also the sections on convex edges and chisel-ground edges. - What Kind of Stone? Basically, a stone needs to cut metal off the edge. The stones below do this well, and for most of us our time would be better spent actually learning how to sharpen than worrying too much about the minor advantages of one stone vs. another. Get the biggest stones you can afford and have room for. Big stones make the job much much easier. The time-honored stone is the arkansas stone. Soft arkansas stones provide the coarser grits, with harder stones providing finer grits. Many people use oil on these stones, ostensibly to float the steel particles and keep them from clogging the stone. John Juranitch has popularized the notion that oil should absolutely not be used when sharpening, and indeed results from people using arkansas stones without oil have been very positive. However, if you have ever used oil on your arkansas stone, you need to continue using it, or it will clog. If you never put oil on your arkansas stone, you will never need to. Synthetic stones are very hard, and won't wear like natural stones (a natural stone may get a valley scooped out of it over time). They clean well with detergent-charged steel wool, I use SOS detergent pads, they clean very very fast and very well. I know you're thinking that cleaning with steel wool will cause the stone to shear off the steel wool and fill up the stone even worse! But I assure you that is not the case, for whatever reason SOS pads clean synthetic stones, they do not make the stones dirtier. Spyderco and Lansky are some manufacturers who sell synthetic stones. Stones with diamond dust embedded in them cut aggressively. You can remove metal very quickly if you need to, but be careful lest you remove too much too fast! DMT, Eze-Lap, and Lansky are some manufacturers who sell diamond-based hones. Some diamond stones have the problem that the diamond dust wears off quickly, leaving you with a useless stone. I have experience with the DMT stones, and can say that they do not have this problem. Natural stones will eventually dish out in the center with use. To flatten them back out, put some sandpaper on a flat surface and rub the stone top on it. Wet/dry 400 grit sandpaper mounted on a table top or glass is reputed to work well. - Should I Use Water or Oil on My Stone John Juranitch has popularized the notion that no liquid should be used on the sharpening stone. Since oil has been used for many years on stones, this leads to some confusion. Basically, the purpose of the stone is to rub against the blade and remove metal. Slippery liquids, like water and especially oil, make the rubbing slicker, causing less metal to be removed, causing sharpening to take longer. On top of that, Juranitch claims that as your edge is being sharpened on the stone, the oil-suspended metal particles are washing over the edge and dulling it again. On an arkansas stone, the oil is supposedly needed to float metal particles away from the stone surface, lest the stone clog and stop cutting. Some people on this group have used their arkansas stones without oil or water, and have reported good results. However, if you've already used oil on your arkansas stone, you'll probably need to keep using oil forever on it, because an already-oiled stone will clog up if not kept oiled. If you have a fresh arkansas stone, go ahead and use it without the oil, and things should be okay. I've used diamond and synthetic stones without liquid, and they worked just fine. In any case, the bottom line is: use liquid or don't. Using the liquid will make the sharpening process slower and messier, but if you insist on using liquid and are willing to spend more time, that's your call. If you don't have the skill to hold a consistent angle, it's all moot anyway! - How Fine Should My Stone Be? Important notes on grits! The finer the stone, the more polished your edge will become. The rougher the stone, the more the scratches in the edge function as "micro-serrations". Though the actual ontological status of the micro-serrations is debatable (Juranitch says there's no such thing, having looked under a microscope), the serrated effect of the coarser grind is undoubtably there. The more polished the edge, the better your edge will work for doing push-cut applications like shaving, whittling, peeling an apple, skinning a deer. Also, your cut will be more clean and precise with the polished edge. A rougher, more micro-serrated edge will work better for slicing-type applications like cutting through coarse rope, wood, etc. The serrations present more edge surface area, and tend to "bite" into the thing being cut. It is possible to get an edge that will shave hair with a medium (300-400 grit) stone, with practice [I specifically mention stone grits because many manufacturers call the 300-400 grit stones "coarse" rather than "medium"]. The medium stone will have pretty big micro-serrations. In previous version of the FAQ I stated that I find this too rough a finish for my general utility edge. However, I've since found this to be a really nice edge finish for utility work -- it won't shave great, but it does a really nice job on cutting coarse materials. Anyone should be able to get an edge that shaves hair easily with a fine (600 grit) stone. I find this to be a pretty useful finishing stone, leaving enough micro-serrations for general utility work but still being hair-shaving sharp. An extra fine stone (1200 grit) should start polishing the edge, and you should end up with a hair-popping sharp edge. This is also a good choice for a general utility finish, especially on a partially-serrated blade, where the serrations can be used when the slightly-polished main part of the blade becomes less effective. ************ IMPORTANT TIP **************** Many treatises on sharpening tend to focus on getting a polished, razor-like edge. This is partially the fault of the tests we use to see how good our sharpening skills are. Shaving hair off your arm, or cutting a thin slice out of a hanging piece of newpaper, both favor a razor polished edge. An edge ground with a coarser grit won't feel as sharp, but will outperform the razor polished edge on slicing type cuts, sometimes significantly. If most of your work involves slicing cuts (cutting rope, etc.) you should strongly consider backing off to the coarser stones, or even a file. This may be one of the most important decisions you make -- probably more important than finding the perfect sharpening system! Recently, Mike Swaim (a contributor to rec.knives) has been running and documenting a number of knife tests. Mike's tests indicate that for certain uses, a coarse-ground blade will significantly outperform a razor polished blade. In fact, a razor polished blade which does extremely poor in Mike's tests will sometimes perform with the very best knives when re-sharpened using a coarser grind. Mike's coarse grind was done on a file, so it is very coarse, but he's since begun favoring very coarse stones over files. The tests seem to indicate that you should think carefully about your grit strategy. If you know you have one particular usage that you do often, it's worth a few minutes of your time to test out whether or not a dull-feeling 300-grit sharpened knife will outperform your razor-edged 1200-grit sharpened knife. The 300-grit knife may not shave hair well, but if you need it to cut rope, it may be just the ticket! If you ever hear the suggestion that your knife may be "too sharp", moving to a coarser grit is what is being suggested. A "too sharp" -- or more accurately, "too finely polished" -- edge may shave hair well, but not do your particular job well. Even with a coarse grit, your knife needs to be sharp, in the sense that the edge bevels need to meet consistently. - Stropping Stropping consists of running the edge along a piece of leather charged with some kind of abrasive like stropping paste or green chromium oxide (I had previously said jeweler's rouge is okay, but have since heard that a more aggressive cutter is needed). It is done for a short time to finish off the burr, or for a long time to give the edge a final polish. Stropping is an easy-to-use finishing step (as opposed to the difficulty in keeping a consistent angle on a stone). Before you strop, remember to wash and dry your newly-sharpened knife. If you don't, you might grind leftover metal particles into the strop itself. If you need to charge your strop, put a little paste on your fingers and rub it into the leather. To strop, you run the edge along the leather with the blade positioned spine first and the edge trailing (opposite way from sharpening on a stone). With a thin straight razor, the spine of the razor is always kept on the strop, and direction is switched by flipping the razor over along its spine. In my experience, this isn't necessary with a utility knife. You can strop with the blade spine raised above the leather (don't lift too high -- if the edge bites into the leather, that's too high), and change directions by lifting the entire knife up, turning it over, and placing it back down. If you've never stropped your knife before, give it a try. It will come out very sharp, but of course polished and so optimized for push-type shaving cuts. The strop to some extent can make up for less-than-perfect sharpening technique -- a sharp knife can be made extra sharp on the easy-to-use strop. However, I always tell people that they should be able to get their knife scary sharp without the strop; don't let the strop keep you from recognizing weaknesses and improving your technique on the hone! In the absence of a strop (say, out in the field), many people use their jeans and then their palm as a strop. There's probably no need to point out the danger in this practice, so don't do it. That said, I must admit to having done this myself on numerous occasions, and having gotten good results. A safer and more effective trick is to use cardboard (say, the cardboard back of a standard notepad). You can optionally charge the cardboard with metal polish, just rub it in with your fingers. Then strop as above. Even without the polish, the cardboard will strop acceptably. Stropping with cardboard has become a de-facto standard last step for sharpening chisel-ground (single-side ground) knives these days, for burr removal purposes. - Using a Steel Please see our instruction page for steels HERE The sharpening steel should be an important part of your knife maintenance strategy, and is maybe the most mis-understood part. When you use a knife for a while, especially a knife with a soft, thin edge like that found on a kitchen knife, the edge tends to turn a bit and come out of alignment. Note that the edge is still reasonably sharp, but it won't feel or act very sharp because the edge may not point straight down anymore! At this point, many people sharpen their knives, but sharpening is not necessary and of course decreases the life of the knife as you sharpen the knife away. It's also akin to putting in a thumbtack with a sledgehammer. The steel is used to re-align the edge on the knife. Read that last sentence again. Re-aligning the edge is all the steel needs to do. It does not need to remove any metal. Since the steel's only function is to re-align, the sharpening steel can be perfectly smooth and still do its job. You'll see many bumpy steels on the market, but this is almost certainly because consumers think that steels must have bumps to work. The bumps can actually mess up the edge, and make the work of steeling more difficult. There are two schools of thought on steels. Some people use grooved steels, which align the edge more aggressively but are harder on the edge. I use a smooth steel, which is easy on the edge but may align the edge more slowly. To use the steel, run the knife along the steel on one side using light pressure -- no more pressure than the actual weight of the knife is required! Then switch to the other side and do it again. Repeat a number of times until your edge feels sharp and nice again. I hold the steel in my left hand, the blade in my right, and lightly run the blade along the steel while keeping the steel stationary, but it's perfectly fine to move both steel and knife past each other at the same time, or whatever works for you. Most people run the knife down the steel edge first, the same direction you use when sharpening. This yields good results. However, theoretically going edge-first along the steel could bite into the edge while straigtening it, and so many people like to go spine-first (like when stropping) instead. This method also works well, and I personally have begun to feel that steeling in this direction gets my edge the tiniest bit sharper. It is more awkward to go spine-first, so if you have any trouble with it switch to edge-first, and your edge will end up just fine. If you steel your knife every time you use it, you will significantly lengthen the time between sharpenings. I've found steeling to be critical on kitchen knives, but it's an incredible help even on ultra-hard ATS-34. III. Putting it all together - Some tips and tricks If you want to determine if you are sharpening at the same angle that the blade already has, try this easy trick. Mark the edge bevel with a magic marker. Then go ahead and do a stroke or two on the stone (or take a stroke with your Lansky, or whatever). Now pick the knife up and look at the edge. If you have matched the edge angle exactly, the magic marker will be scraped off along the entire edge bevel. If your angle is too high, only the marker near the very very tip will be gone. If your angle is too low, only the marker near where the edge bevel meets the primary bevel will be gone. Another trick is to use light and shadow to get the edge precisely. Using strong directly light, lay the edge down on the stone and watch the shadow below. As you tilt the spine up, the edge contacts more of the stone and the shadow disappears. As the shadow just disappears and the edge just touches the stone, that's your angle. If you go higher than that, you should be able to see the edge tilting over onto the stone. One trick to freehand sharpening is to use your thumb as a guide. I'll place the spine of the blade against my thumb pad, and rest my thumb on the stone. That way, I can feel the angle between the knife and stone, and make sure that it is consistent. Typically, the hardest part to freehand sharpen is the curving belly of the blade, as keeping a consistent angle here is more difficult. I use all these tricks extensively when sharpening freehand, and use the marker trick even when I'm using a sharpening rig. One thing to keep in mind is that there's no reason you need to keep the factory edge. If you're happy with that edge, great. However, many factory edges are too thick to really cut well. If you're unhappy with the cutting ability of your knife, don't be afraid to try lowering the angle a bit. - Why does my knife go dull so fast? A frequent complaint I hear is, "I sharpened my knife and did a good job, it was really sharp. But then after just a few uses it went dull." Why does this happen? One of the following factors -- and many times a combination of those factors -- is at play: 1. Wire edge If the burr is not properly ground off, but is instead turned downwards, your knife will feel razor sharp. However, the burr quickly turns or snaps off, leaving you with a very dull-feeling knife. Be sure to use a light touch at the end of the sharpening process and make sure the burr is gone. 2. Thin, weak edge If the bevel angle you chose for your knife is too thin for your usage, the edge can chip and get really wavy. Try using a larger edge angle, or at least double-grinding the edge. 3. Edge turning In regular use, all edges turn to some extent. If your edge is much too thin, it will be damaged as above in #2. If it's only slightly too thin, it will quickly turn out. As long as the the edge is not being damaged, but simply turning, you don't necessarily need to re-grind a thicker edge. Instead, see if frequent steeling will give you the performance you need, it can really work wonders. Keep in mind it's difficult to see a turned-out edge by eyeball -- only using the steel will tell you conclusively if this is your problem. 4. Thick edge A thin edge will feel sharper than a thick edge. If your edge is too thick, when it starts to dull even the slightest bit it may no longer feel so sharp anymore. Consider using a lower angle and seeing if that helps. Of course, your thinner edge will be more fragile than the thicker edge, so you may end up chipping the edge out, and the thinner edge may not be feasible. I personally feel that this is rarely the real problem, so be sure to try the other solutions first. 5. Soft steel Occasionally, a manufacturer or maker will make a mistake while heat treating, and the steel in the blade will end up too soft. No matter how well you sharpen, your blade will still go dull quickly. Often, soft steel is the first thing people point at when their edges dull quicker than expected. But this problem really is relatively rare; in the vast majority of cases, it is one of the above reasons rather than soft steel that's the problem. So if your edge dulls too fast, don't blame the steel until you've exhausted the above options. If it's still dulling quickly, contact the manufacturer, they are often interested in testing to see if they made a mistake. - Keeping bevels even With the burr method of sharpening, one side of the knife can end up with more metal taken off it than the other side. This forces the edge to be not-quite-centered. This normally doesn't affect performance, but aesthetically it doesn't look quite right. This happens because as you grind the one side to create the bevel, it has to go far (that is, lots of metal has to be removed) to create the bevel on the other side. When you flip to the other side, the edge is already thin, so very little metal has to be removed to flop the burr back over. There are a few ways to avoid this. First, you can just switch which side you start sharpening on. If you start with the edge that's on the right side of the blade, that edge bevel will be a little bigger than the one on the left side. So next time you sharpen, start off on the left side. You can pick which side to start your sharpening on by just using whatever side seems to have a smaller edge. The method I use is to switch sides while trying to get the initial burr. If I start on the right side, I'll sharpen for 20 seconds or so and then check for a burr. If no burr is found, I switch to the left side and repeat. I keep doing this -- sharpening one side for a time, then the other side -- until I finally start to feel a burr. Then I just follow the normal directions: I keep sharpening that side until the burr goes the entire length of the edge, then flip and get a burr along the entire length of *that* edge. The fact that I'm flipping the knife keeps the edge bevels even. - Putting it all together As you use your knives, you may see your sharpening strategies change. Many of us seem to be homing in on the philosophy that you should choose the thinnest, coarsest edge possible that can do your job without the edge being damaged, especially in the context of general usage. Thin blades and low-angle edges seem to cut better than thick ones. They slide through the material being cut with less effort. Which makes sense -- the wider the V that your edge forms, the more metal you're pushing into the material. However, go too thin and your edge can chip out. So go as thin as you can without damaging your edge, and use a steel often to touch it up. Obviously, what "thin" means depends on usage. "Thin" means one thing when the job is slicing soft materials, something else entirely when chopping hard materials. Lightly double-grinding a shallower bevel on a thin edge may help give you the best of both worlds. If your first bevel is a thin 15-degrees (say), try doing a few light finishing strokes at a stouter 24-degress. Coarser edges slice better than polished ones, but a polished edge will laterally push-cut (e.g., shave) better. If you find yourself doing a lot of lateral push cuts, then you'll obviously want to polish your edge more. However, most people do much more slicing than push cutting, and as a result end up with a much more polished edge than optimal. You should play around with coarser grits. The edge won't do as well shaving hair, but unless this particular knife is a razor blade, who cares? You may find the knife cutting through other materials much better than usual. Lastly, I have become something of a steel fanatic. Steeling your knife frequently -- even if the blade is of really high-hardness steel -- works wonders on the edge. It also allows you to have a slightly thinner (and hence better-cutting) edge, because if you steel frequently you'll keep the edge aligned. If you don't steel at all, you'll have to use an edge that's thick enough not to turn, and that may negatively affect sharpness and cutting power. Remember to steel frequently, because if your edge's shape gets too bad, the steel won't work and you'll have to go back and sharpen. Know any good knife sharpening tips or tecniques you would like to pass on to others? We'd be happy to hear them- simply click here to e-mail them to us. Below is a good read about steel and knives written by Joe Talmadge. Another good read from wikipedia is List of blade materials. We use primarily affordable but quality steel from England and Germany:
Check out the good read below.... KNIFE STEEL FAQ Author: Joe Talmadge Last Updated: October 2005 Table of Contents: I. What makes a steel perform?
III. Steels
V. Bibliography I. What Makes A Steel Perform? A. Introduction Steel is the heart of the blade. The search for higher-performance steels has to a number of wonderful materials in recent years. Steel by itself isn't the sole determiner of knife performance, of course. Heat treatment, blade geometry, handle geometry and materials all effect how a knife performs for a particular job. However, those other qualities can be difficult to measure. You can't tell by looking at it how well a blade has been heat-treated, and you can only make educated guesses on how well the blade and handle geometry will work. With steel, however, you can get a full listing of its alloying elements, something measureable and somehow satisfying. As a result, it's easy to fall into the trap of putting too much emphasis on the steel itself. A knife is more than steel, and it's important not to forget that. In addition, many modern steels perform so well, that knife decisions can often be made based on other factors than marginal increases in steel performance. The question of "what's the best steel" or "rank the following steels in order from best to worst" often comes up. The resulting replies can never be totally accurate, because depending on the jobs the knife will be used for, the blade geometry, and the quality of the heat treat, what is "best" and what is "worst" can be very fluid. If you want to make an educated decision about steels, try to learn the basics of steel properties, and go from there. B. Sharpening for performance That doesn't mean that significant performance advantages can't be had by choosing the right steel for the job. In fact, choosing a steel can significantly impact the performance of a knife. But, to really bring out the performance of a particular steel, you need to take advantage of the better steel in your sharpening plan. If a weak, brittle steel can perform the job when sharpened at 25-degrees-per-side, a strong, tough steel might give you some marginal performance improvements if it, too, is sharpened at 25-degrees-per-side. However, to really bring out the performance of the better steel, trying bringing it down to 20-degrees per side, or less. The advantage of the better steel is that it is strong and tough enough to hold up with a small edge angle -- and smaller edge angles radically out-perform bigger edge angles. It's easy to get a 10-to-1 perform advantage for certain cutting jobs by cutting 5 degrees off your sharpening angle. This leads to the general rule: To really see the advantages of a better steel, exploit that steel in your sharpening program. If you're going to sharpen all your knives at the same angle regardless of steel, you might de-emphasize steel choice somewhat. On the internet, I'll often see someone posting about wanting to upgrade from their ATS-34 folder to one that has S30V, and then in a different post, declare that they sharpen all their knives at 20° per-side. Why spend all that extra money for S30V, just to get some marginal wear resistance advantages but no other performance advantages? If that same user would take advantage of S30V's superior toughness and drop the edge angle to 15° per-side, they would see a large leap in cutting performance, along with the extra wear resistance. Because of choosing the right sharpening angle, the more expensive S30V knife now gives an impressive return on investment. *Now* you can see what all the fuss is about! C. Design for performance In the section above, we highlighted what the user can do to bring out the best performance in a high-performance steel. But the user is only half the equation; now we will look at what the knifemaker might do with a higher-performance steel. As the knifemaker moves from one steel to another, it is often possible to modify the design of a particular knife to take advantage of the newer steel, and raise performance. For example, it is possible to make a hard-use "tactical/utility" knife from ATS-34. To make sure the ATS-34 will take the kind of stresses it might see in this environment, the edge might be left a bit thick (sacrificing cutting performance), or the hardness brought down a touch (sacrificing strength and wear resistance), or both. If the same maker moves to much-tougher S30V, he might be able to thin out the edge, thin out the entire knife, and raise the hardness, bringing up performance as a whole. Moving to differentially-tempered 5160 might allow the maker to re-profile even more for performance. If we're talking about a fighter, moving from 1095 to 3V might allow the maker to make the knife much thinner, lighter, and faster, while significantly increasing cutting performance and maintaining edge integrity. So to really take advantage of the higher-performance steel, we want the knifemaker to adjust the knife design to the steel, wherever he thinks it's appropriate. If a knifemaker offers the same knife in multiple steels, ask about what the characteristics are in each steel, and the how's and why's of where the design has changed to accomodate each steel offered. Note that there can be good reasons that a knifemaker might not change the blade profile even though the steel has changed. Maybe he's particularly good at heat-treating one steel or another, so that the differences between disparate steels are minimized. Maybe the higher-performance steel is not available in the next stock thickness down. Maybe instead of higher cutting performance, the maker would rather offer the same cutting performance but in a knife that can take more abuse. Maybe his customers tend to only buy thicker knives regardless of performance. So work with the maker to understand the choices being made with the different steels being offered. If you understand the kind of performance you need, you'll be able to make a wise choice. D. Properties of performance steels What is it we're looking for in a steel, anyway? Well, what we are looking for is strength, toughness, wear resistance, and edge holding. Sometimes, we're also looking for stain resistance. Wear resistance: Just like it sounds, wear resistance is the ability to withstand abrasion. Generally speaking, the amount, type, and distribution of carbides within the steel is what determines wear resistance. Strength: The ability to take a load without permanently deforming. For many types of jobs, strength is extremely important. Any time something hard is being cut, or there's lateral stress put on the edge, strength becomes a critical factor. In steels, strength is directly correlated with hardness -- the harder the steel, the stronger it is. Note that with the Rockwell test used to measure hardness in a steel, it is the hardness of the steel matrix being measured, not the carbides. This, it's possible for a softer, weaker steel (measuring low on the Rockwell scale) to have more wear resistance than a harder steel. S60V, even at 56 Rc, still has more and harder carbides than ATS-34 at 60 Rc, and thus the S60V is more wear resistant, while the ATS-34 would be stronger. Toughness: The ability to take an impact without damage, by which we mean, chipping, cracking, etc. Toughness is obviously important in jobs such as chopping, but it's also important any time the blade hits harder impurities in a material being cut (e.g., cardboard, which often has embedded impurities). The knifemaker will be making a tradeoff of strength versus toughness. Generally speaking, within the hardness range that the steel performs well at, as hardness increases, strength also increases, but toughness decreases. This is not always strictly true, but as a rule of thumb is generally accurate. In addition, it is possible for different heat treat formulas to leave the steel at the same hardness, but with properties such as toughness, wear resistance, and stain resistance significantly differing. Stain resistance (rust resistance): The ability to withstand rust (oxidation). Obviously, this property can be helpful in corrosive environments, such as salt water. In addition, some types of materials are acidic (e.g., some types of foods), and micro-oxidation can lead to edge loss at the very tip of the edge, over a small amount of time. In "stainless" cutlery steels, stain resistance is most affected by free chromium -- that is, chromium that is not tied up in carbides. So, the more chromium tied up in carbides, the less free chromium there is, which means more wear resistance but less stain resistance. Edge holding: The ability of a blade to hold an edge. Many people make the mistake of thinking wear resistance and edge holding are the same thing. Most assuredly, it is not; or rather, it usually is not. Edge holding is job-specific. That is, edge holding is a function of wear resistance, strength, and toughness. But different jobs require different properties for edge holding. For example, cutting through cardboard (which often has hard embedded impurities), toughness becomes extremely important, because micro-chipping is often the reason for edge degradation. Whittling very hard wood, strength becomes very important for edge-holding, because the primary reason for edge degradation is edge rolling and impaction. Wear resistance becomes more important for edge holding when very abrasive materials, such as carpet, are being cut. And for many jobs, where corrosion- inducing materials are contacted (such as food prep), corrosion can affect the edge quickly, so corrosion resistance has a role to play as well. There are other properties that significantly effect how a steel performs: Ability to take an edge: Some steels just seem to take a much sharper edge than other steels, even if sharpened the exact same way. Finer-grained steels just seem to get scary sharp much more easily than coarse-grained steels, and this can definitely effect performance. Adding a bit of vanadium is an easy way to get a fine-grained steels. In addition, an objective of the forging process is to end up with a finer-grained steel. So both steel choice,and the way that steel is handled, can effect cutting performance. Manufacturing process: Cleaner, purer steels perform better than dirtier, impure steels. The cleaner steel will often be stronger and tougher, having less inclusions. High quality processes used to manufacture performance steel include the Argon/Oxygen/Decarburization (AOD) process, and for even purer steel, the Vacuum Induction Melting/Vacuum Arc Remelting (VIM/VAR) process, often referred to as double vacuum melting or vacuum re-melting. Edge toothiness: Some steels seem to cut aggressively even when razor polished. For these steels, even when they're polished for push-cutting, their carbides form a kind of "micro serrations" and slice aggressively. E. What's the "best steel". Understanding these properties will get you started to fundamentally understanding steels and how choice of steel can effect performance. I often see people asking, what's the best steel? Well, the answer depends so much on what the steel is being used for, and how it's heat-treated, that the questioner can never possibly get an accurate answer. For a knife lover, it's worth spending a little time understanding steel properties -- only by doing so well he really understand what the "best steel" might be for his application. Putting it all together, you can see how these properties might determine your steel choice. To pick on S60V and ATS-34 again, there seems to be a feeling that S60V is "better" in some absolute sense than ATS-34. But S60V is often left very soft, around 55-56 Rc, to make up for a lack of toughness. Even left that soft, an abundance of well-distributed vanadium carbides gives S60V superior wear resistance to ATS-34, at acceptable toughness levels. However, does that mean S60V is "better" than ATS-34? Well, many users will find edge rolling and impaction the primary causes of edge degradation for everyday use. For those users, even though S60V is more wear-resistant, S60V is also so soft and weak that they will actually see better edge retention with ATS-34! The S60V user can leave the edge more obtuse (raise the sharpening angle) to put more metal behind the edge to make it more robust, but now the S60V will suffer serious cutting performance disadvantages versus the thinner ATS-34 edge. So, the next general rule:
The properties of different steels will be laid out below. But in your search for the knife with the "best steel" for your uses, I always suggest you ask the makers of the knives you're considering which steels they would use. The knifemaker will usually know which steels he can make perform the best. And as pointed out above, heat treat is absolutely critical to bringing out the best in a steel. A maker who has really mastered one particular steel (e.g., Dozier and D2) might be able to make that steel work well for many different uses. So never go just by charts and properties; make sure you also consider what the knifemaker can do with the steel. III. ELEMENTS OF STEEL At its most simple, steel is iron with carbon in it. Other alloys are added to make the steel perform differently. Here are the important steel alloys in alphabetical order, and some sample steels that contain those alloys: Carbon: Present in all steels, it is the most important hardening element. Also increases the strength of the steel but, added in isolation, decreases toughness. We usually want knife-grade steel to have >.5% carbon, which makes it "high-carbon" steel. Chromium: Added for wear resistance, hardenability, and (most importantly) for corrosion resistance. A steel with at least 13% chromium is typically deemed "stainless" steel, though another definition says the steel must have at least 11.5% *free* chromium (as opposed to being tied up in carbides) to be considered "stainless". Despite the name, all steel can rust if not maintained properly. Adding chromium in high amounts decreases toughness. Chromium is a carbide-former, which is why it increases wear resistance. Manganese: An important element, manganese aids the grain structure, and contributes to hardenability. Also strength & wear resistance. Improves the steel (e.g., deoxidizes) during the steel's manufacturing (hot working and rolling). Present in most cutlery steel except for A2, L-6, and CPM 420V. Molybdenum: A carbide former, prevents brittleness & maintains the steel's strength at high temperatures. Present in many steels, and air-hardening steels (e.g., A2, ATS-34) always have 1% or more molybdenum -- molybdenum is what gives those steels the ability to harden in air. Nickel: Adds toughness. Present in L-6 and AUS-6 and AUS-8. Nickel is widely believed to play a role in corrosion resistance as well, but this is probably incorrect. Phosphorus: Present in small amounts in most steels, phosphorus is a essentially a contaminant which reduces toughness. Silicon: Contributes to strength. Like manganese, it makes the steel more sound while it's being manufactured. Sulfur: Typically not desirable in cutlery steel, sulfur increases machinability but decreases toughness. Tungsten: A carbide former, it increases wear resistance. When combined properly with chromium or molybdenum, tungsten will make the steel to be a high-speed steel. The high-speed steel M2 has a high amount of tungsten. The strongest carbide former behind vanadium. Vanadium: Contributes to wear resistance and hardenability, and as a carbide former (in fact, vanadium carbides are the hardest carbides) it contribute to wear resistance. It also refines the grain of the steel, which contributes to toughness and allows the blade to take a very sharp edge. A number of steels have vanadium, but M2, Vascowear, and CPM T440V and 420V (in order of increasing amounts) have high amounts of vanadium. BG-42's biggest difference with ATS-34 is the addition of vanadium. IV. STEELS A. Non-stainless Steels (carbon, alloy, and tool steels): These steels are the steels most often forged. Stainless steels can be forged (guys like Sean McWilliams do forge stainless), but it is very difficult. In addition, carbon steels can be differentially tempered, to give a hard edge-holding edge and a tough springy back. Stainless steels are not differentially tempered. Of course, carbon steels will rust faster than stainless steels, to varying degrees. Carbon steels are also often a little bit less of a crap shoot than stainless steels -- I believe all the steels named below are fine performers when heat treated properly. In the AISI steel designation system, 10xx is carbon steel, any other steels are alloy steels. For example, the 50xx series are chromium steels. In the SAE designation system, steels with letter designations (e.g., W-2, A2) are tool steels. There is an ASM classification system as well, but it isn't seen often in the discussion of cutlery steels, so I'll ignore it for now. Often, the last numbers in the name of a steel are fairly close to the steel's carbon content. So 1095 is ~.95% carbon. 52100 is ~1.0% carbon. 5160 is ~.60% carbon. D2 D2 is sometimes called a "semi-stainless". It has a fairly high chrome content (12%), but not high enough to classify it as stainless. It is more stain resistant than the carbon steels mentioned above, however. It has excellent wear resistance. D2 is much tougher than the premium stainless steels like ATS-34, but not as tough as many of the other non-stainless steels mentioned here. The combination of great wear resistance, almost-stainlessness, and good toughness make it a great choice for a number of knife styles. Bob Dozier is one maker who uses D2. Benchmade has begun using D2 in its Axis AFCK. Ref - D2 Steel Composition. M2 A "high-speed steel", it can hold its temper even at very high temperatures, and as such is used in industry for high-heat cutting jobs. It is slightly tougher, and is slightly more wear resistant, than D2. However, M2 rusts easily. Benchmade has started using M2 in one of their AFCK 710 variations. Ref -M2 Steel Composition. Note - Now discontinued. A2 An excellent air-hardening tool steel, it is tougher than D2 and M2, with less wear resistance . As an air-hardening steel, don't expect it to be differentially tempered. Its good toughness makes it a frequent choice for combat knives. Chris Reeve and Phil Hartsfield both use A2. Ref - A2 Steel Composition. O1 This is a steel very popular with forgers, as it has the reputation for being "forgiving". It is an excellent steel, that takes and holds an edge superbly, and is tough (although not as tough as, say, 5160). It rusts easily, however. Randall Knives uses O1, so does Mad Dog Knives. Ref - O1 Steel Composition. W-2 Reasonably tough and holds an edge well, due to its .2% vanadium content. Most files are made from W-1, which is the same as W-2 except for the vanadium content (W-1 has no vanadium). Ref - W2 Steel Composition. The 10-series 1095 (and 1084, 1070, 1060, 1050, etc.) Many of the 10-series steels for cutlery, though 1095 is the most popular for knives. When you go in order from 1095-1050, you generally go from more carbon to less, from more wear resistance to less wear resistance, and tough to tougher to toughest. As such, you'll see 1060 and 1050, used often for swords. For knives, 1095 is sort of the "standard" carbon steel, not too expensive and performs well. It is reasonably tough and holds an edge well, and is easy to sharpen. It rusts easily. This is a simple steel, which contains only two alloying elements: .95% carbon and .4% manganese. The various Kabars are usually 1095 with a black coating. Ref - 1095 vs. 1084 vs. 1070 vs. 1060 vs. 1050 Steel Composition Comparison. Carbon V Carbon V is a trademarked term by Cold Steel, and as such is not necessarily one particular kind of steel; rather, it describes whatever steel Cold Steel happens to be using, and there is an indication they do change steels from time to time. Carbon V performs roughly between 1095-ish and O1-ish, in my opinion, and rusts like O1 as well. I've heard rumors that Carbon V is O1 (which I think is unlikely) or 1095. Numerous industry insiders insist it is 0170-6. Some spark tests done by a rec.knives reader seem to point the finger at 50100-B. Since 50100-B and 0170-6 are the same steel (see below), this is likely the current Carbon V. 0170-6 - 50100-B These are different designations for the same steel: 0170-6 is the steel makers classification, 50100-B is the AISI designation. A good chrome-vanadium steel that is somewhat similar to O1, but much less expensive. The now-defunct Blackjack made several knives from O170-6, and Carbon V may be 0170-6. 50100 is basically 52100 with about 1/3 the chromium of 52100, and the B in 50100-B indicates that the steel has been modified with vanadium, making this a chrome-vanadium steel. Ref - 0170-6 - 50100-B Steel Composition. L-6 A band saw steel that is very tough and holds an edge well, but rusts easily. It is, like O1, a forgiving steel for the forger. If you're willing to put up with the maintenance, this may be one of the very best steels available for cutlery, especially where toughness is desired. In a poll on the knifemakers email list back in the 1990s, when asked what the makers would use for their personal knife, L-6 emerged as the top choice. Ref - L6 Steel Composition. 5160 A steel popular with forgers, it is popular now for a variety of knife styles, but usually bigger blades that need more toughness. It is essentially a simple spring steel with chromium added for hardenability. It has good wear resistance, but is known especially for its outstanding toughness. This steel performs well over a wide range of hardnesses, showing great toughness when hardened in the low 50s Rc for swords, and hardened up near the 60s for knives needing more edge holding. Ref - 5160 Steel Composition. 52100 Formerly a ball-bearing steel, and as such previously only used by forgers, it's available in bar stock now. It is similar to 5160 (though it has around 1% carbon vs. 5160 ~.60%), but holds an edge better. It is less tough than 5160. It is used often for hunting knives and other knives where the user is willing to trade off a little of 5160's toughness for better wear resistance. However, with the continued improvement of 52100 heat treat, this steel is starting to show up in larger knives and showing excellent toughness. A modified 52100 is being used by Jerry Busse in his lower-cost production line, and such high-performance knife luminaries as Ed Fowler strongly favor 52100. Ref - 52100 Steel Composition. CPM 10V Crucible's somewhat-stain-resistant 10V provides incredible wear resistance with D2-class toughness. It is an outstanding choice when maximum wear resistance is desired, but not super toughness. Ref - CPM 10V Steel Composition. CPM 3V CPM's incredibly tough 3V gives excellent wear resistance and good stain resistance as well, although when it does stain, it is said to pit rather than surface rust. When maximum toughness is desired, with very good wear resistance, 3V is a great choice. Ref - CPM 3V Steel Composition. INFI INFI is currently only used by Jerry Busse. In place of some of the carbon (INFI contains 0.50% carbon), INFI has nitrogen. The result is a non-stainless steel that is nevertheless extremely stain resistant (informally reported at close to D2, or even better), incredibly tough for a high-alloy ingot steel, and with extremely good wear resistance. Ref - INFI Steel Composition. Vascowear A very hard-to-find steel, with a high vanadium content. It is extremely difficult to work and very wear-resistant. It is out of production. Ref - Vascowear Steel Composition. B. Stainless Steels Remember that all steels can rust. But the following steels, by virtue of their > 13% chromium, have much more rust resistance than the above steels. I should point out that there doesn't appear to be consensus on what percent of chromium is needed for a steel to be considered stainless. In the cutlery industry, the de-facto standard is 13%, but the ASM Metals Handbooks says "greater than 10%", and other books cite other numbers. It probably makes more sense to measure stainlessness by the amount of free chromium (chromium not tied up in carbides), because free chromium is what forms the chromium oxide on the blade surface that offers stain resistance. The alloying elements have a strong influence on the amount of chromium needed; lower chromium with the right alloying elements can still have "stainless" performance. Because any particular stainless steel is often heat treated to around the same hardness (i.e., 440C is usually around 57 Rc, ATS-34 is 59-61 Rc, S60V is getting consensus at around 56 Rc, etc.) even by different manufacturers, it's a bit easier to give a general feeling of the performance you'll get from different classes of stainless steels, without introducing too many inaccuracies. Please note, though, that the act of grouping differing steels in classes definitely does oversimplify, and some of these steels might more properly fit between the class it's in, and the following (or previous) one. In addition, better heat treat can move a steel up in performance significantly. Last disclaimer: not everyone will agree with the groupings I have here. Whew, all that said, here is a general categorization of stainless steels: 420 and 420J represent the low end of stainless steels. They are very stain resistant, and are tough due to being very soft. However, they are also very weak, and not very wear resistant. Generally speaking, expect these steels to lose their edge quickly through abrasion and impaction. They are used in less-expensive knives due to their ease of machining. Ref - 420 vs. 420J2 Steel Composition Comparison. 440A and its relative peers, 425M, 420HC, 12C27, and 6A are the next group. They can be hardened more than the previous group, for better strength, and they are more wear resistant, though wear resistance is just getting to the point of acceptability. 440A and 12C27 are the leaders of this group, with solid heat treat both perform okay. 12C27 is said to be particularly pure and can perform very well when heat treated properly. 6A trails those two steels, though with its vanadium content, can take a razor edge. 425M and 420HC trail the rest. Ref - 440A vs. 425M vs. 420HC vs. 12C27 vs. AUS-6A Steel Composition Comparison. Gin-1, ATS-55, 8A, and 440C comprise the next group. These steels will usually be stronger than the previous group, and more wear-resistant. Generally speaking, they retain excellent stain resistance properties, though ATS-55 sticks out here as not particularly stain resistant. 8A is also worth a mention, with some vanadium content, it can take an extremely sharp edge very easily, but is also the weakest and least wear-resistant of this group. Ref - Gin-1 vs. ATS-55 vs. AUS-8 vs. 440C Steel Composition Comparison. ATS-34/154CM, VG-10, and S60V are the next group up. It's difficult to make generalizations about ATS-34 and 154-CM -- they are in such widespread use that heat treat varies widely. These steels provide a high-end performance benchmark for stainless steels, and hold an edge well, and are tough enough for many uses (though not on par with good non-stainlesses). They aren't very stain resistant, however. VG-10 can be thought of as being like ATS-34 and 154-CM, but doing just about everything a hair better. It's a little more stain resistant, tougher, holds an edge a little better. And VG-10 has vanadium in it, it's fine-grained and takes the best edge of this group. S60V has by far the best wear resistance of the group, though consensus is becoming that it should be left around the same hardness as 440C (56ish Rc), which means it will be relatively weak compared to ATS-34, 154-CM, and VG-10, and so it will indent and lose its edge quickly when strength is required. S60V is the winner here when pure abrasion resistance is much more important than edge strength. Ref - ATS-34 vs. 154CM vs. VG-10 vs. CPM S60V Steel Composition Comparison. BG-42, S90V, and S30V constitute the next group. BG-42 has better wear resistance than all the previous steels except for S60V. It is tougher than ATS-34, and more stain resistant. It is wear resistant to the point where it can be difficult to sharpen. S90V represents the ultimate in wear resistance in the steels discussed so far. Also tougher than ATS-34, and more stain resistant. It can be very difficult to put an edge on. It is difficult enough to machine than it is used almost exclusively in custom knives, not production knives. In your buying decisions, you might want to take into account the difficulty of sharpening these steels. S30V backs off on the wear resistance of S90V, but is significantly tougher and easier to sharpen. It is more wear resistant than BG-42. The jury is still out, but it may end up this week's ultimate high-end all-around stainless steel, due to high performance coupled with easier machinability and sharpenability than the other steels in this class. Ref - CPM S90V vs. BG-42 vs. CPM S30V Steel Composition Comparison. Okay, on to the steels in more detail: 420 Lower carbon content (<.5%) than the 440 series makes this steel extremely soft, and it doesn't hold an edge well. It is used often for diving knives, as it is extremely stain resistant. Also used often for very inexpensive knives. Outside salt water use, it is too soft to be a good choice for a utility knife. Ref - 420 Steel Composition. 420HC 420 modified with more carbon, to be roughly comparable to 440A. Ref - 420HC Steel Composition. 440 A - 440 B - 440C The carbon content (and hardenability) of this stainless steel goes up in order from A (.75%) to B (.9%) to C (1.2%). 440C is an excellent, high-end stainless steel, usually hardened to around 56-58 Rc, very tough and with good edge-holding at that hardness. 440C was the king of stainless cutlery steels in the 1980s, before ATS-34 took the title in the 1990s. All three resist rust well, with 440A being the most rust resistant, and 440C the least. The SOG Seal 2000 is 440A, and Randall uses 440B for their stainless knives. 440C is fairly ubiquitous, and is generally considered a very good general-use stainless, tougher and more stain resistant than ATS-34 but with less edge-holding and weaker. If your knife is marked with just "440", it is probably the less expensive 440A; if a manufacturer had used the more expensive 440C, he'd want to advertise that. The general feeling is that 440A (and similar steels, see below) is just good enough for everyday use, especially with a good heat treat (we've heard good reports on the heat treat of SOG's 440A blades, don't know who does the work for them). 440-B is a very solid performer and 440-C is excellent. Ref - 440A vs. 440B vs. 440C Steel Composition Comparison. 425M - 12C27 Both are very similar to 440A. 425M (.5% carbon) is used by Buck knives. 12C27 (.6% carbon) is a Scandanavian steel used often in Finish puukkos and Norwegian knives. 12C27 is said to perform very well when carefully heat treated, due to its high purity. When done right, it may be a slighter better choice than 440A and its ilk. Ref - 425M vs. 12C27 Steel Composition Comparison. AUS-6 - AUS-8 - AUS-10 (aka 6A 8A 10A) Japanese stainless steels, roughly comparable in carbon content to 440A (AUS-6, .65% carbon) and 440B (AUS-8, .75% carbon) and 440C (AUS-10, 1.1% carbon). AUS-6 is used by Al Mar, and is a competitor to low-end steels like 420J2. Cold Steel's use of AUS-8 has made it pretty popular, as heat treated by CS it won't hold an edge like ATS-34, but is a bit softer (and therefore weaker) and tougher. 8A is a competitor of middle-tier steels like ATS-55 and Gin-1. AUS-10 has roughly the same carbon content as 440C but with slightly less chromium, so it should be a bit less rust resistant but perhaps a bit tougher than 440C. It competes with higher-end steels, like ATS-34 and above. All 3 steels have some vanadium added (which the 440 series lacks), which will improve wear resistance and refines the grain for both good toughness, and the ability to sharpen to a very keen edge. Many people have reported that they are able to get knives using steels that include vanadium, like 8A, sharper than they can get non-vanadium steels like ATS-34. Ref - AUS-6A vs. AUS-8A vs. AUS-10 Steel Composition Comparison. GIN-1 aka G-2 A steel with slightly less carbon, slightly more chromium, and much less moly than ATS-34, it used to be used often by Spyderco in their less-expensive knives. Spyderco has since switched to ATS-55 and 8A, but Benchmade is now using Gin-1 in their less-expensive knives. A very good stainless steel, with a bit less wear resistance and strength than ATS-34. Ref - Gin-1 Steel Composition. ATS-34 - 154-CM ATS-34 was the hottest high-end stainless in the 1990s. 154-CM is the original American version, but for a long time was not manufactured to the high quality standards knifemakers expect, so knifemakers switched over to ATS-34. CPM is again making high-quality 154-CM, and some companies seeking to stick with American-made products (like Microtech) are using it. ATS-34 is a Hitachi product that is very, very similar to 154-CM. Normally hardened to around 60 Rc, it holds an edge very well and is tough enough even at that high hardness. Not as rust resistant as the 400 series above. Many custom makers use ATS-34, and Spyderco (in their high-end knives) and Benchmade are among the production companies that use it. Contrary to popular belief, both steels are manufactured through the Argon/Oxygen/Decarburization process (AOD), not vacuum remelted. Ref - ATS-34 vs. 154CM Steel Composition Comparison. ATS-55 Similar to ATS-34, but with the moly removed and some other elements added. This steel is a good cutlery steel but a tier behind ATS-34 and its closest competitors (other steels in ATS-55's class might be Gin-1 and AUS-8). With the molybdenum removed, ATS-55 does not seem to hold an edge quite like ATS-34, and reports are that it's less rust-resistant. My guess is that with the moly gone, more chromium is tied up in carbides -- which means less free chromium for rust resistance, and softer chromium carbides replacing moly carbides for less wear resistance. Ref - ATS-55 Steel Composition. VG-10 Another vanadium-containing high-end stainless steel. Due to the vanadium content, VG-10 takes a killer edge, just like other vanadium steels like BG-42 and AUS-8. VG-10 is also tougher and more rust-resistant than ATS-34, and seems to hold an edge better. Ref - VG-10 Steel Composition. BG-42Bob Loveless announced a while back that he's switching from ATS-34 to this steel. Keep an eye out for it, it's bound to catch on, although the higher cost, limited stock-size availability, and added difficulty of manufacturing are holding BG-42's popularity back. BG-42 is somewhat similar to ATS-34, with two major differences: It has twice as much manganese as ATS-34, and has 1.2% vanadium (ATS-34 has no vanadium), so look for significantly better edge-holding than ATS-34. The addition of vanadium and the clean manufacturing process (VIM/VAR) also gives BG-42 better toughness than ATS-34. Chris Reeve has switched from ATS-34 to BG-42 in his Sebenzas. Ref - BG-42 Steel Composition. S60V (CPM T440V) - S90V (CPM T420V) Two steels that hold an edge superbly, world class type edge holding, but it can be difficult to get the edge there in the first place. These steels are made with Crucible's particle metallurgy process, and that process allows these steels to be packed with more alloying elements than traditional steel manufacturing methods would allow. Both steels are very high in vanadium, which accounts for their incredible wear resistance. Spyderco offers at least one model in CPM S60V. Spyderco, one major user of S60V, has cut back hardness down to 55-56Rc, in order to keep toughness acceptable, but that sacrifices strength so there is a tradeoff. S90V is CPM's follow-on to 440V, and with less chromium and almost double the vanadium, is more wear-resistant and tougher than S60V -- and, in fact, is probably more wear-resistant than any other stainless steel used in the cutlery industry. As such, S90V is in the running with steels like BG-42 as among the best general-purpose stainless steels; however, S90V is even more expensive and difficult to work than BG-42, so it's strictly in the realm of custom makers currently. Ref - CPM S60V vs. CPM S90V Steel Composition Comparison. CPM S30V: The newest stainless steel from Crucible, purpose-designed as a cutlery steel. This steel gives A2-class toughness and almost-S90V class wear resistance, at reasonable hardness (~59-60 Rc). This mix of attributes is making S30V one of the hottest stainless steels going, with makes such as Chris Reeve switching from BG-42 to S30V. Will this be the new king of general-purpose stainless cutlery steels? We'll know over the next couple of years. Ref - CPM S30V Steel Composition. 400 Series Stainless Before Cold Steel switched to AUS-8, many of their stainless products were marketed as being of "400 Series Stainless". Other knife companies are beginning to use the same term. What exactly *is* 400 Series Stainless? I always imagined it was 440-A, but there's nothing to keep a company from using any 4xx steel, like 420 or 425M, and calling it 400 Series Stainless. Damascus steels are made by forge-welding two or more different metals (usually steels). The billets are heated and welded; to get an idea of the process, see Don Fogg's URL listed in the bibliography. The Damascus is then acid-etched. The different metals etch at different rates, and depth and color contrast are revealed. Damascus can be made with performance and/or aesthetic objectives in mind. Aesthetically, the choice of materials is important. One shiny steel and one darker steel etch out to show the most striking pattern. If the maker is going more for beauty than performance, he might even go with nickel, which is bright but does not perform as well as steel for cutlery applications. The other factor affecting beauty is of course the welding pattern. Many patterns of Damascus are available today, from random to star to ladder, and a whole lot more. The following steels will provide bright lines:
Talonite - Stellite 6K - Boye Dendritic Cobalt (BDC) These cobalt alloys have incredible wear resistance, and are practically corrosion resistant. Stellite 6K has been around for years, but was expensive and very difficult to work, and so is only rarely seen. Talonite is easier to work, and as a result has been gaining in popularity, especially among web-based knife buyers. David Boye uses his casting process to manufacture Boye Dendritic Cobalt. This material is tough and has great wear resistance, but is relatively weak. TitaniumNewer titanium alloys can be hardened near 50 Rc, and at that hardness seem to take something approaching a useful edge. It is extremely rust-resistant, and is non-magnetic. Popular as expensive dive knives these days, because the SEALs use it as their knife when working around magnetic-detonated mines. Mission knives uses titanium. Tygrys makes a knife with a steel edge sandwiched by titanium. Ceramics Numerous knives have been offered with ceramic blades. Usually, those blades are very very brittle, and cannot be sharpened by the user; however, they hold an edge well. Boker and Kyocera make knives from this type of ceramic. Kevin McClungcame out with a ceramic composite knife blade that much tougher than the previous ceramics, tough enough to actually be useful as a knife blade for most jobs. It is also user-sharpenable, and holds an edge incredibly well. IV: Selected Urls For Steel Information In no particular order: # An extensive list of steel links http://www.metalwork.0catch.com/list.htm # Principal Metals vast database of steel properties & terms http://www.principalmetals.com # Matweb's steel database http://www.matweb.com/ # Crucible's Steel Pages, loaded with info on composition/selection/etc. http://www.crucibleservice.com/cscd/crumain2.htm # Suppliers Online huge database of steel info http://www.suppliersonline.com #A.G. Russell's FAQ Pages http://agrussell.com/faq/index.html #Spyderco's Steel Page http://www.spyderco.com/education/steelchart.asp # Knives.com entire site is interesting, but hit "Tech", then "Steel" http://www.knives.com # Metal Mart's dictionary of metallurgical terms http://www.metal-mart.com/dictlist.htm # A list of metallurgical sites, schools, organizations, and journals http://www.mlc.lib.mi.us/~stewarca/metallurgy.html # Titanium Info http://www.halperntitanium.com/ # Don Fogg's excellent info pages http://www.dfoggknives.com # A good steel chart http://www.pizzini.at/steellist.htm V. BIBLIOGRAPHY I got the information for this FAQ from my own experience as a collector and amateur knifemaker, and from conversations with custom makers. There are too many people on the internet who have taught me about steels for me to name them all, but I've particularly sought out the posts of people like Jerry Hossom and Cliff Stamp. I've also read plenty of articles on steels, but here are the ones that I actually had in front of me: Bob Engnath's Blades and Stuff Catalog. Bob's catalog is a must-see for everyone, even for just collectors, as it contains a wealth of information on all kinds of great knife subjects. There is a section on knife steels. Bob passed away in 1998, but if you can find an old copy of his catalog, grab it. "The Secrets of Steel," by Butch Winter, _Tactical Knives_, Spring 1995. "What Alloys Do For Blade Steel," by Wayne Goddard, _Blade_, June 1994. Email conversation with Wayne Goddard, February 1998. Don Fogg's article on Damascus steels from his website www.dfoggknives.com (information used by permission) "Inside Steel: What the Alloying Elements Do For Your Blade", by Ed Severson with Steve Shackleford, _Blade, August 1999. Cockfighting Art and Science of Knife Tying: Filipino Socket Long Knife and Filipino Fork Long Knife4/25/2011 Filipino Fork Long Knife and Old Time Wrap Filipino Fork Long Knife and Adjustable Leather Strip Filipino Fork Long Knife and Leather Pad Filipino Socket Long Knife and Leather Pad (More of a Strip) World Slasher Cup Champion on Filipino Fork Long Knife and Old Time Wrap The word "unay" as translated by google is "concrete". Not so long ago, unay is the norm in making steel spurs for cockfighting in the Philippines. The spur fork base and the spur point are one piece. Nowadays, the fork weapons are made by brazing or soldering together the spur fork base and the spur point. These two pieces can be made by specialists separately. Photo shows unfinished unay (one-piece) Fork (Mexican) Short Knife and unay (one-piece) Fork (American) Long Heel (Gaff).
Fork (Filipino) Long Knife is not shown. |
Categories
All
Archives |
||||||||||||||||||||||||||||||||||||||||||||||||||||||||||||||||||||||||||||||||
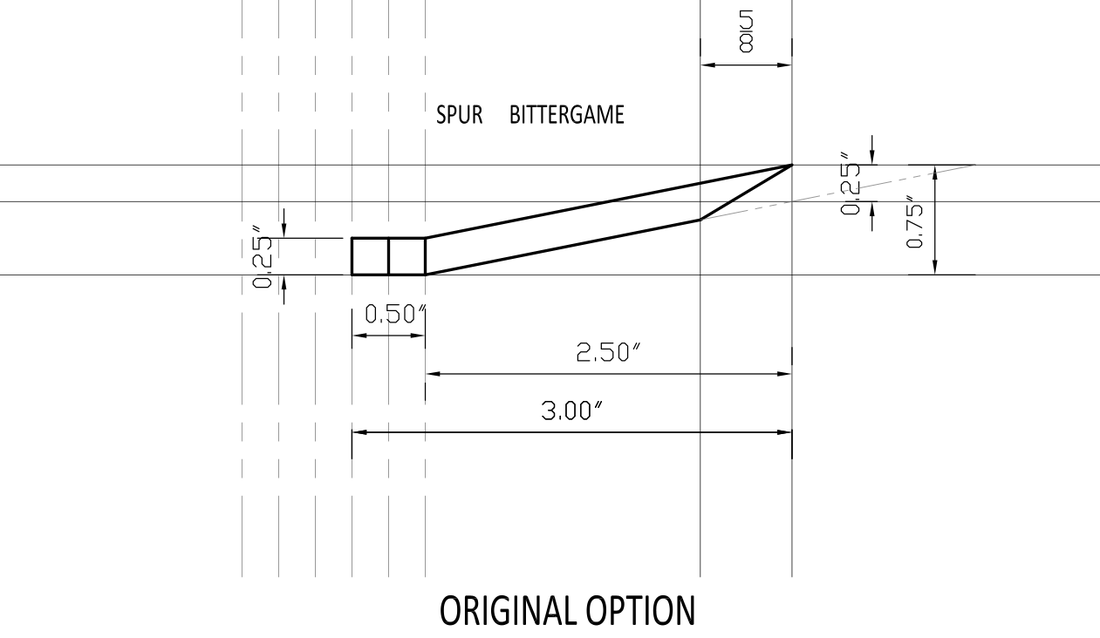
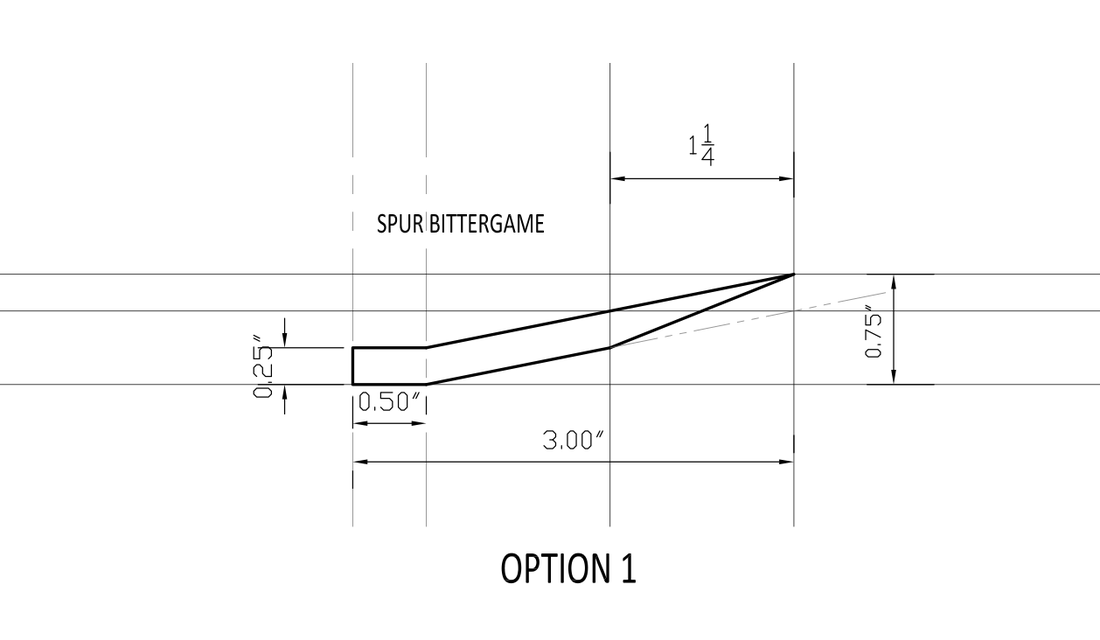
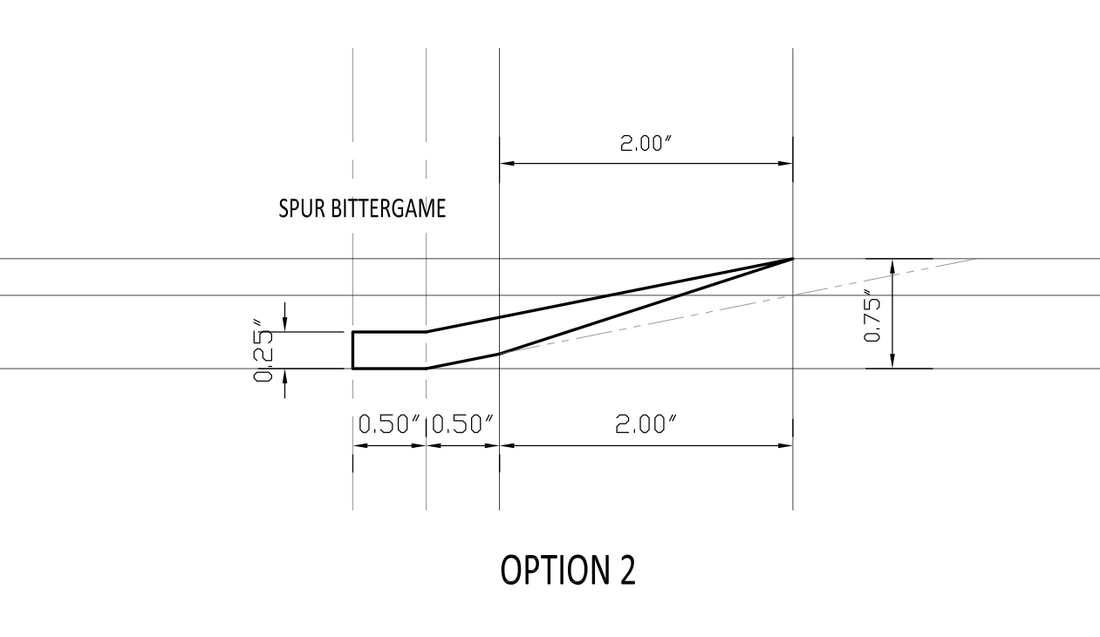
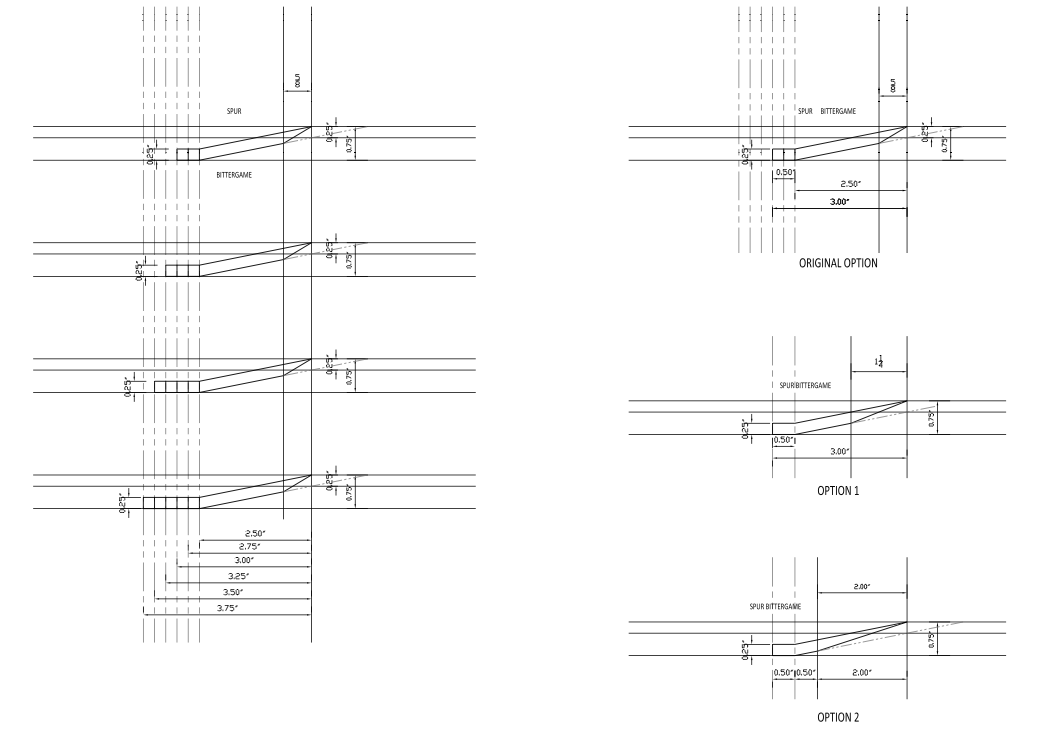
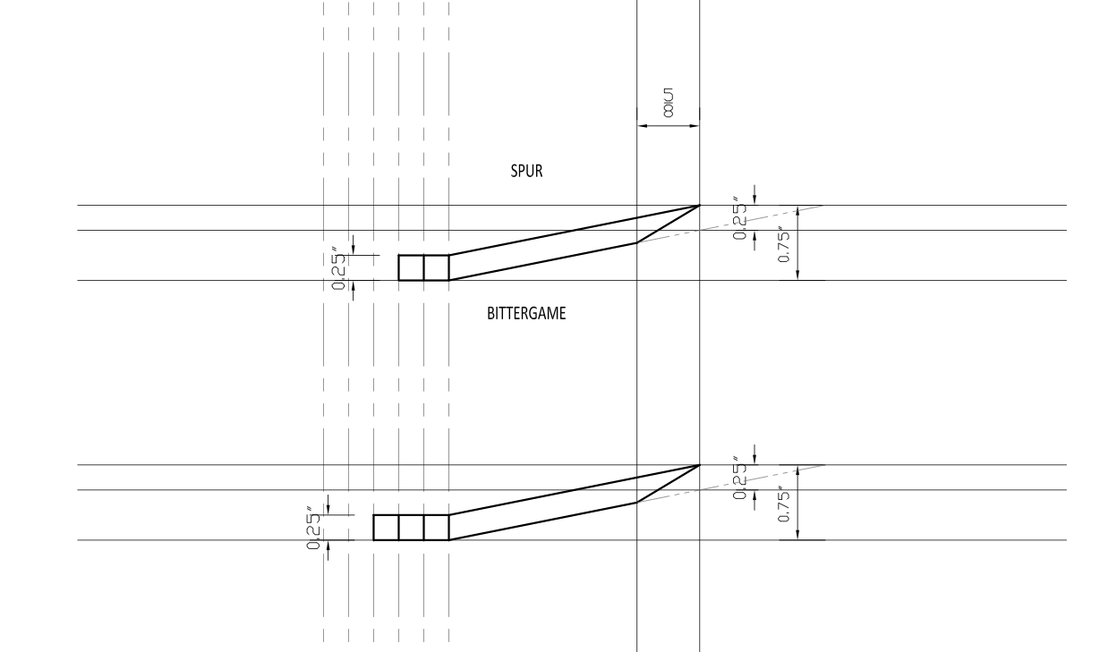
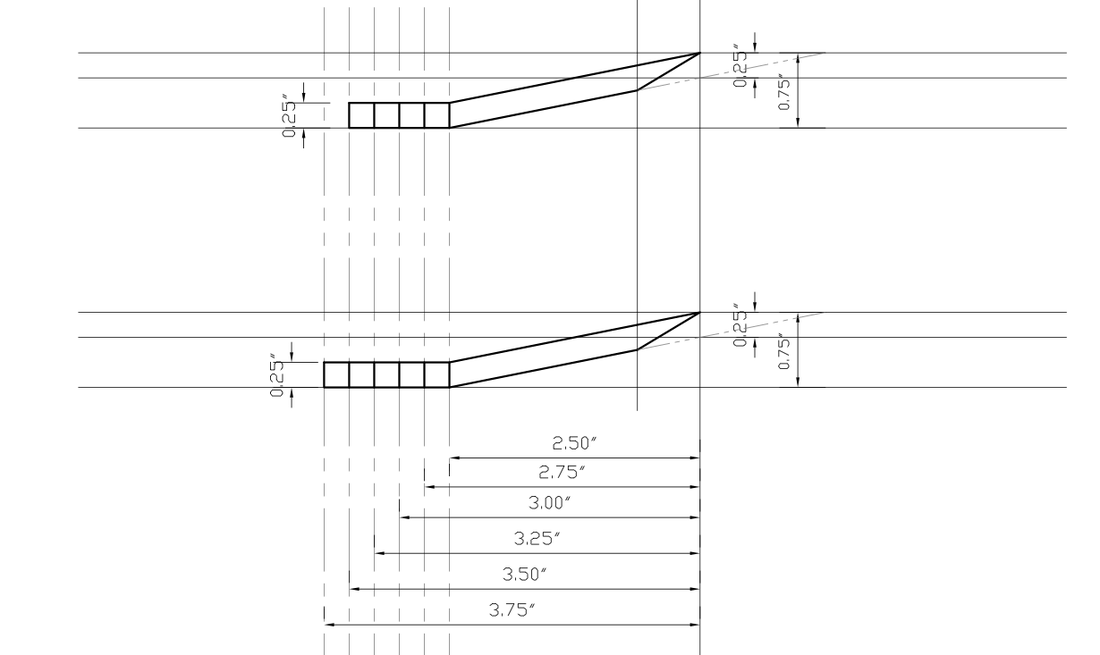
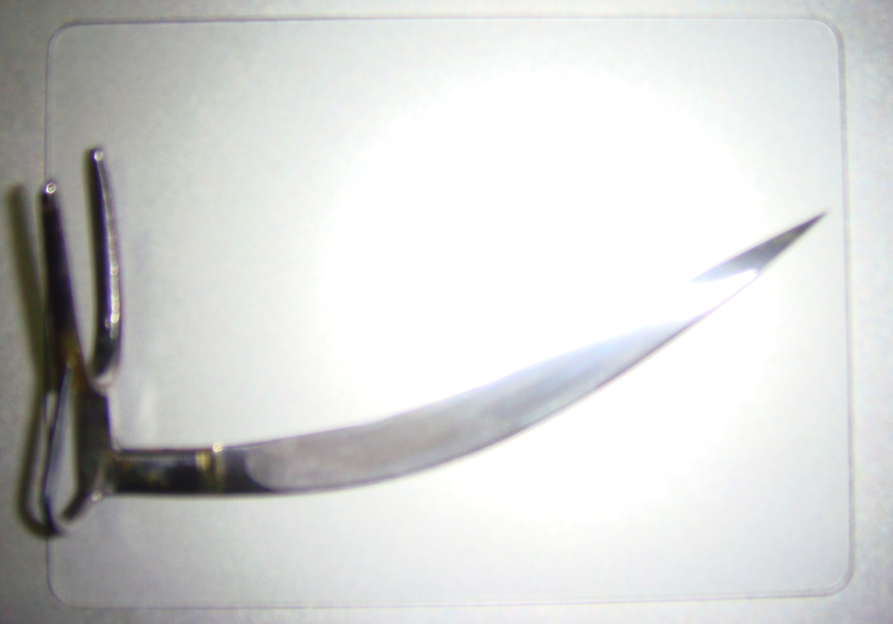
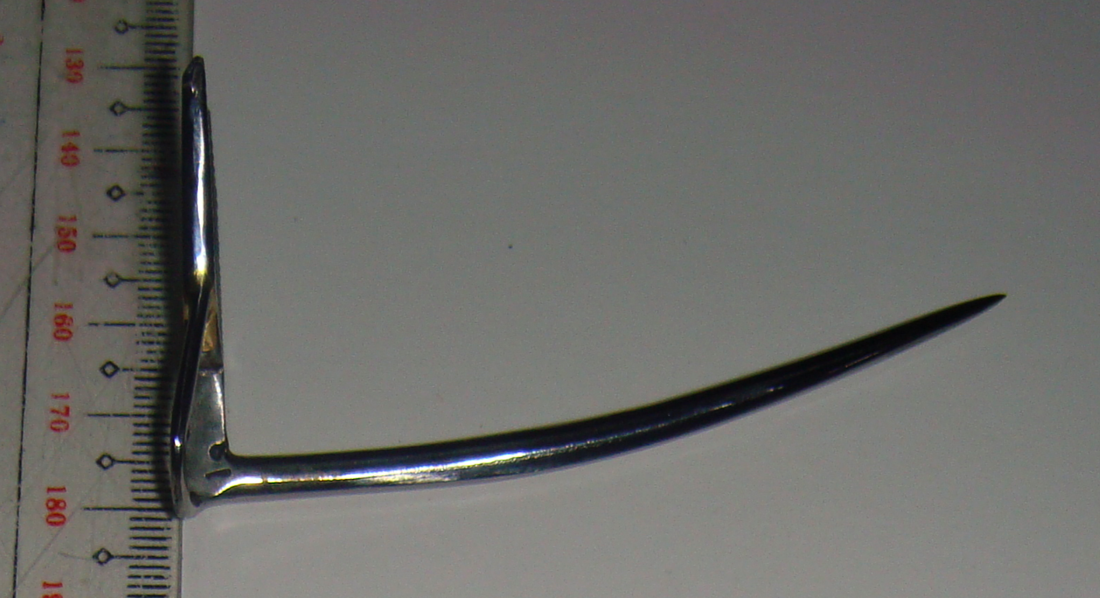
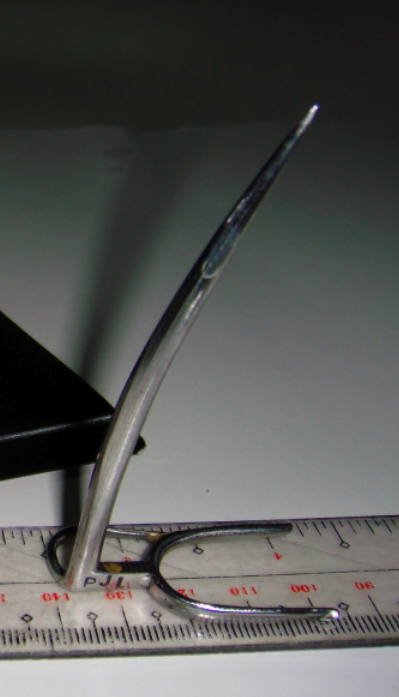
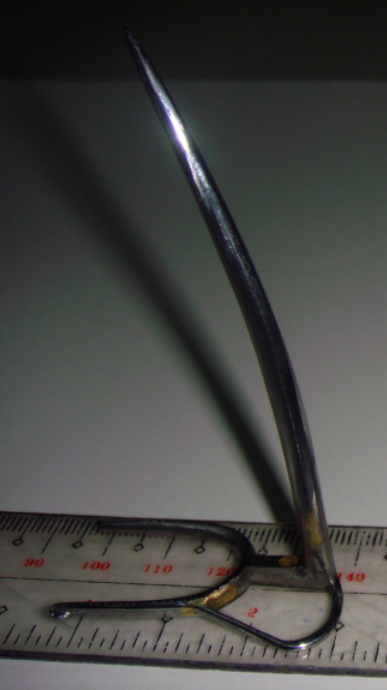
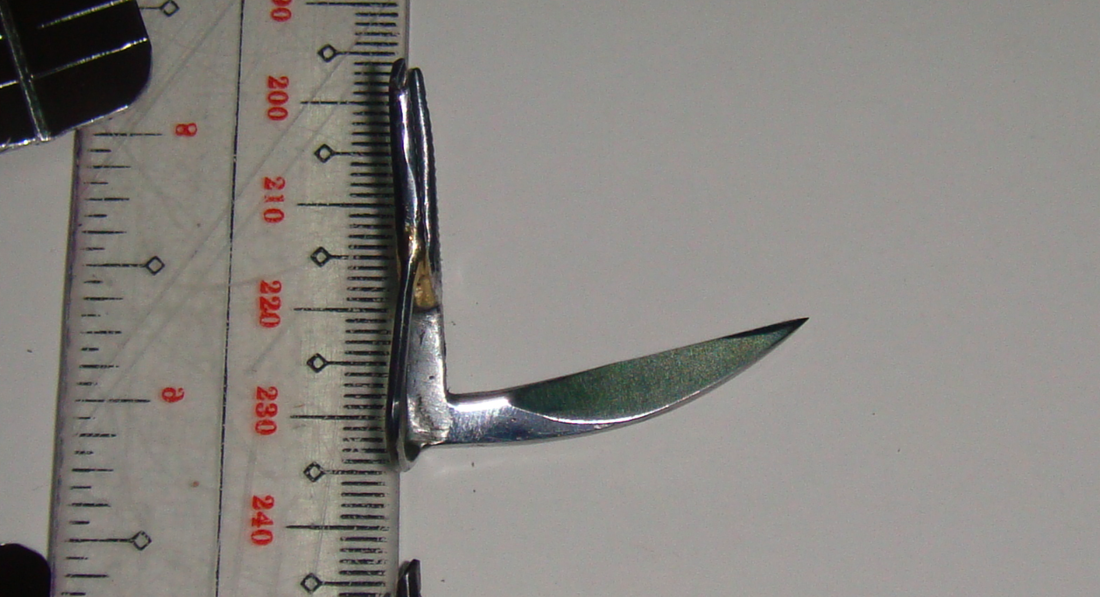
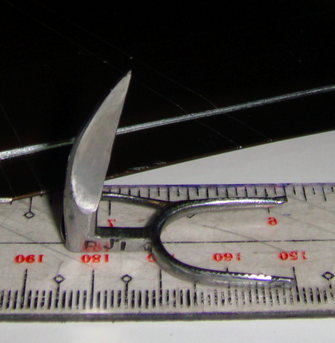
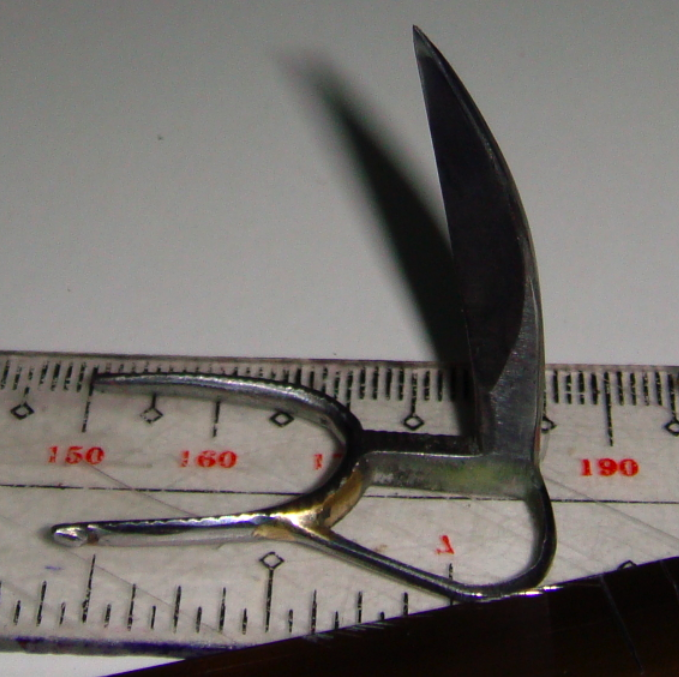
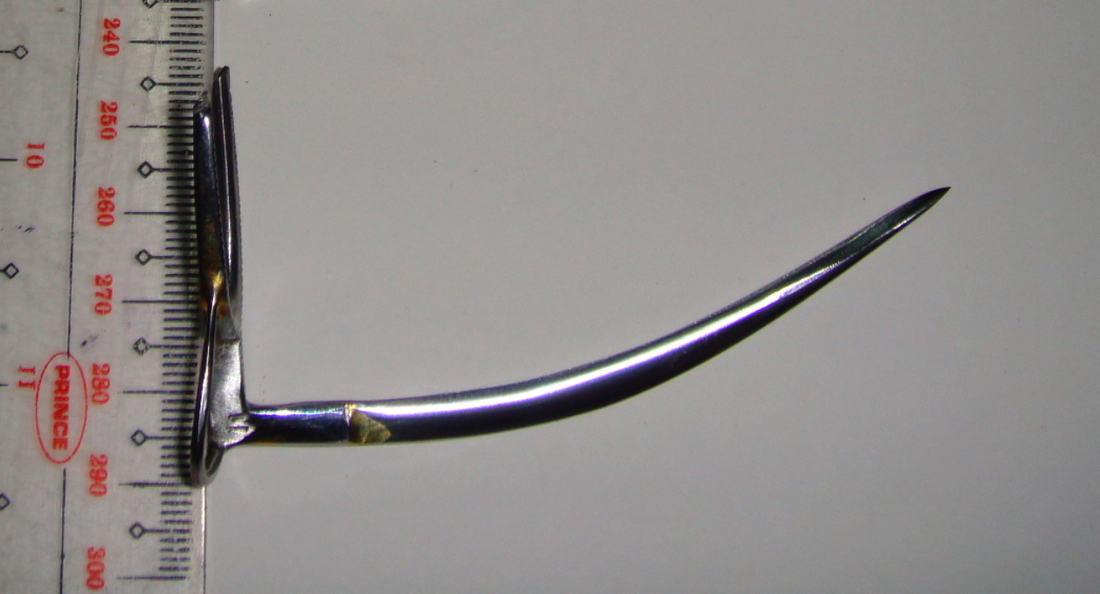
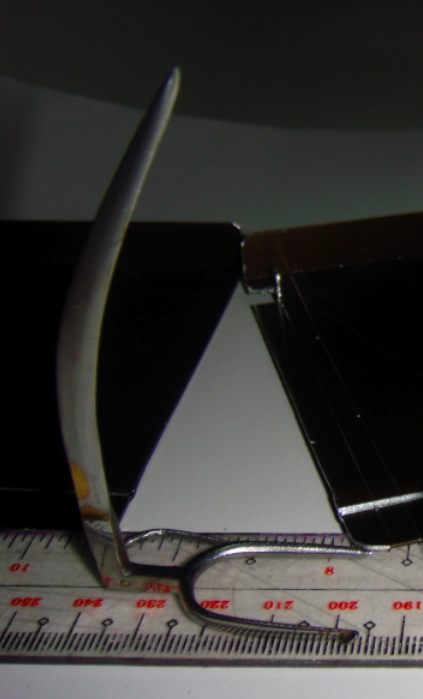
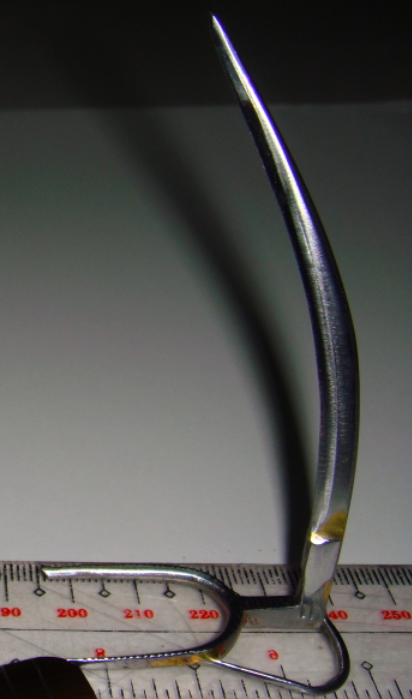

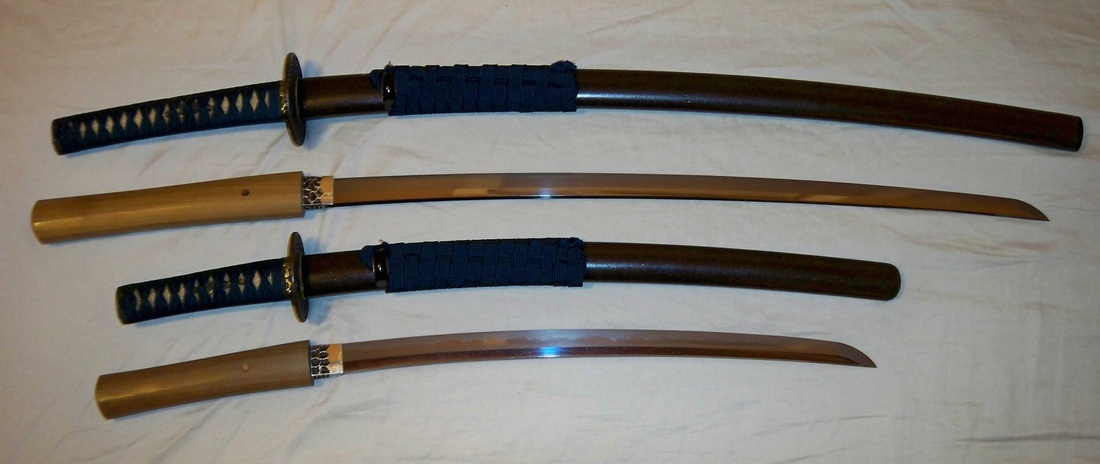
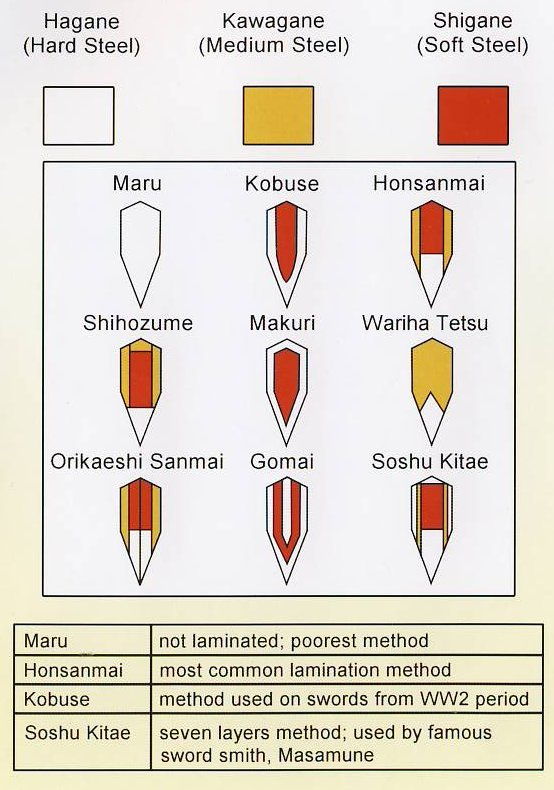
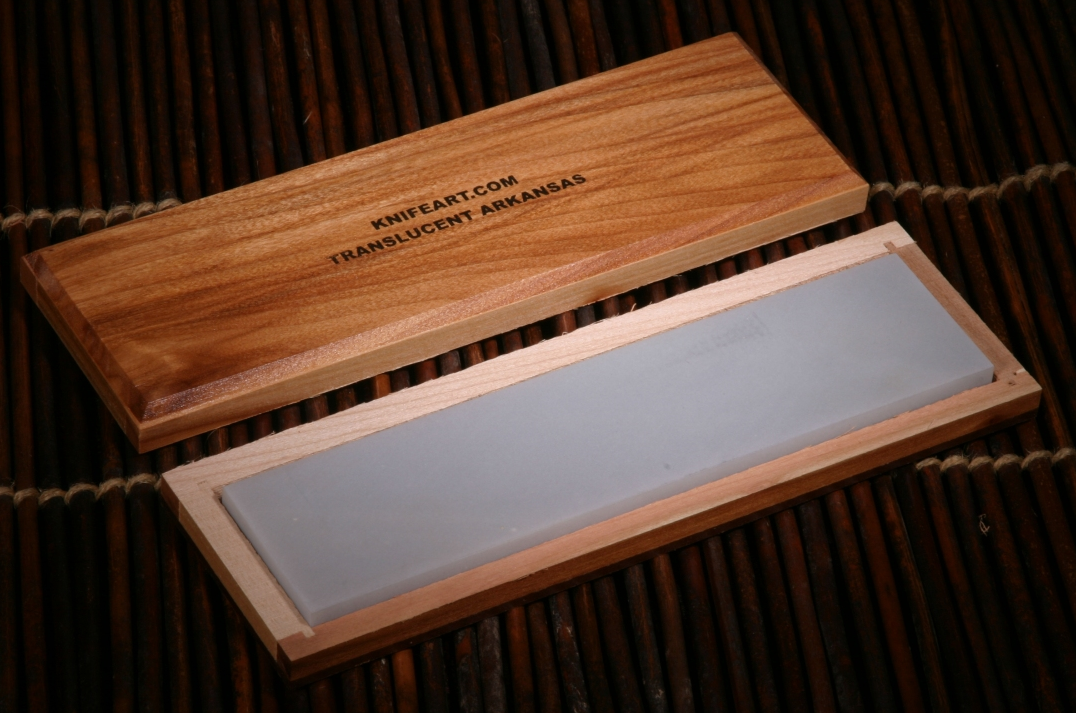
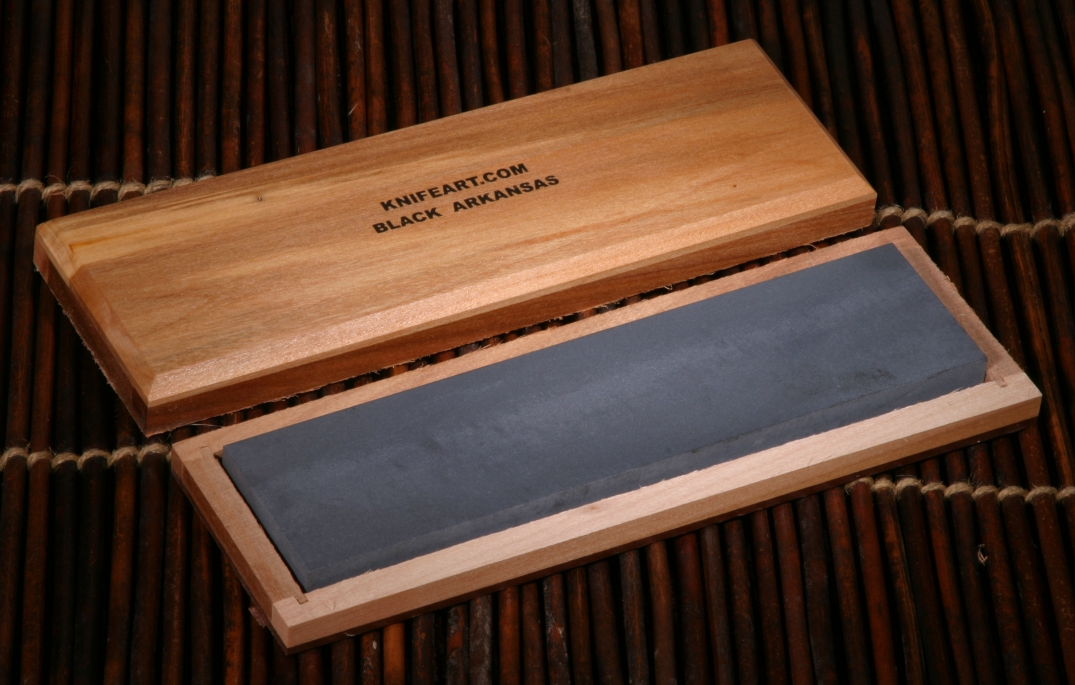

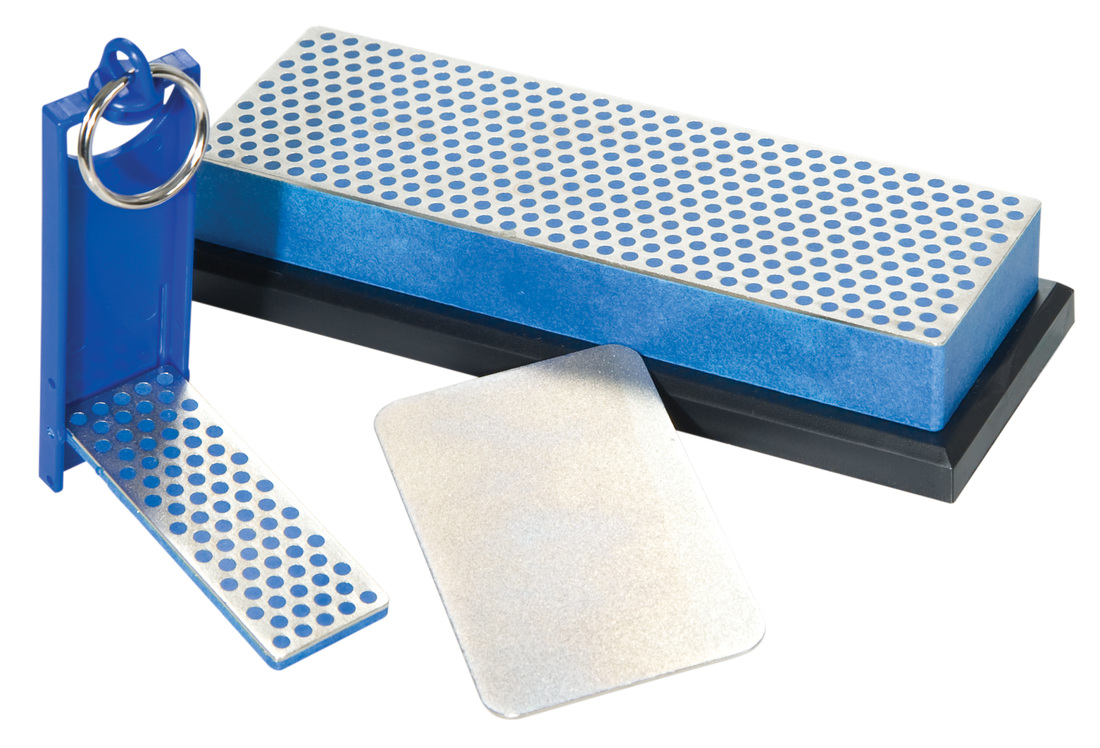
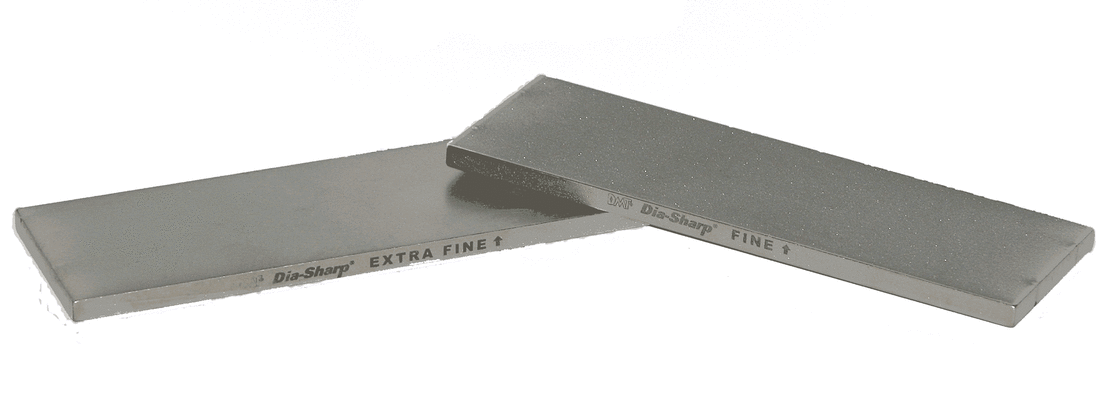
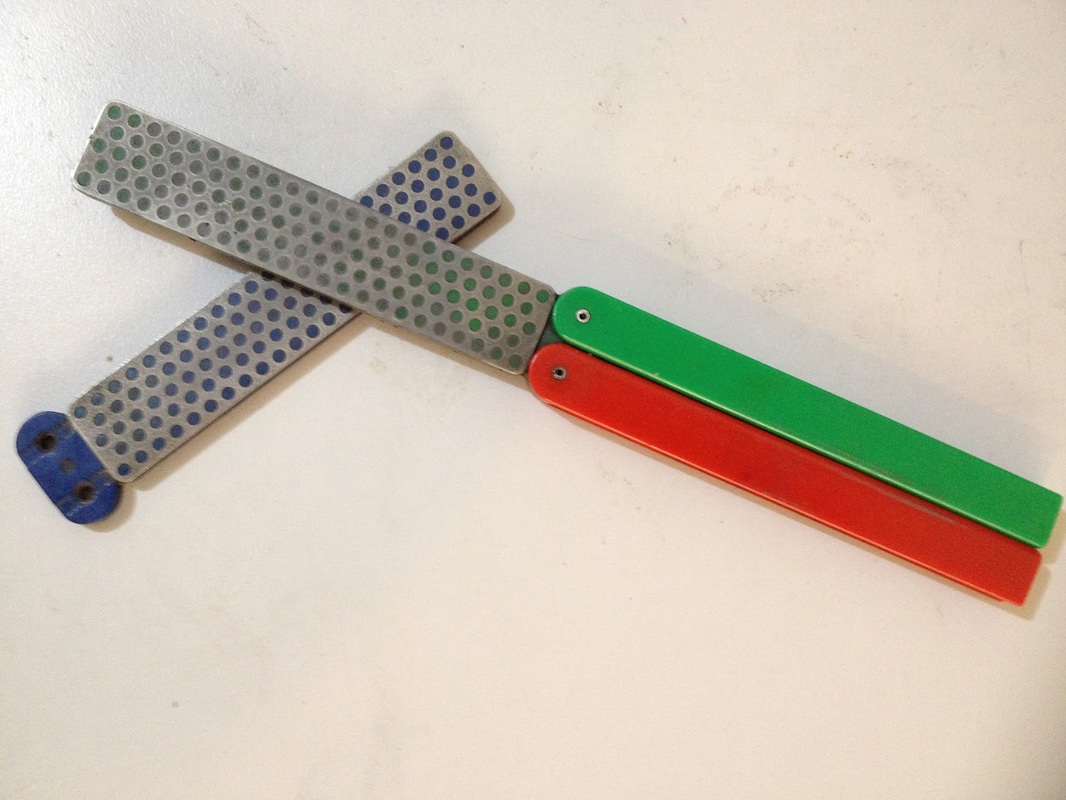
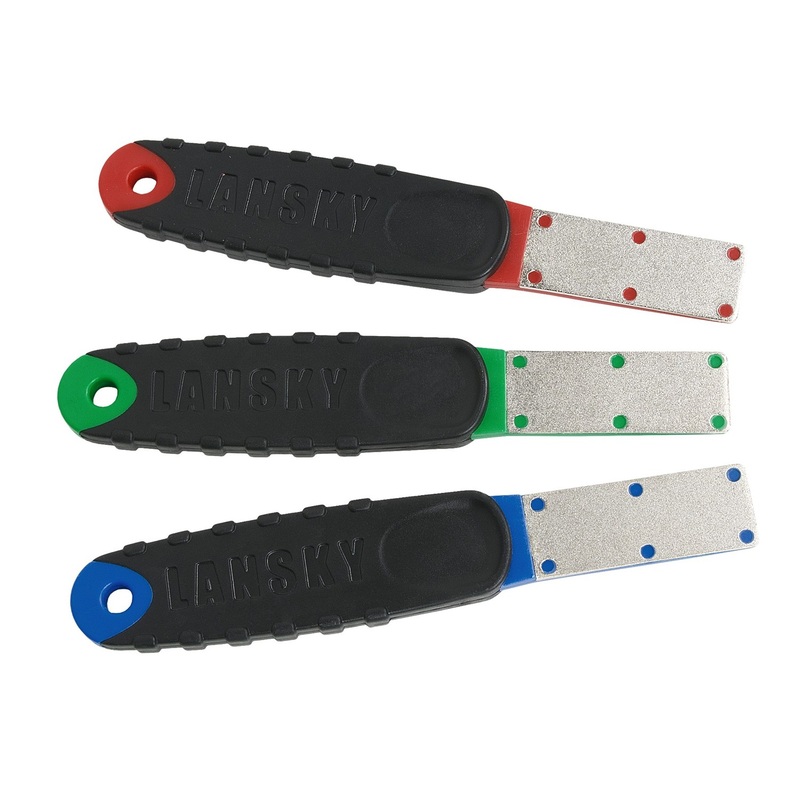
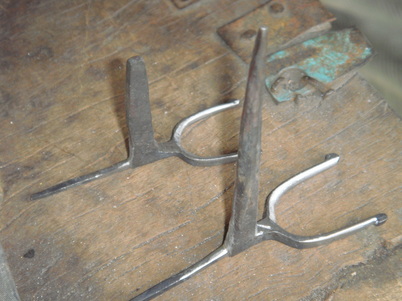
 RSS Feed
